Showing posts with label Chinese. Show all posts

Wednesday, September 14, 2011

Mooncake Festival


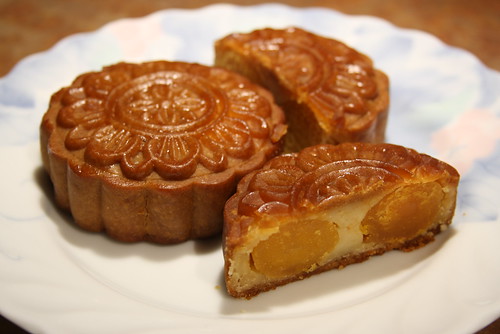
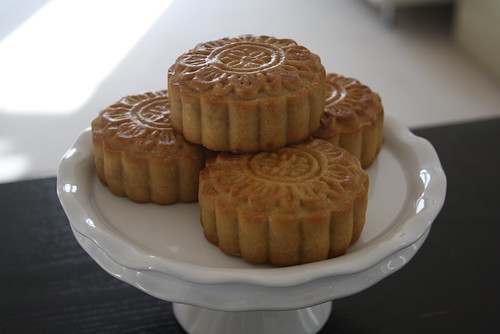
Saw my friend’s mooncakes last year on facebook. They look so pretty! I had this in my mind since then and bought a mould immediately. After keeping the mould in the kitchen for months, finally Mid-Autumn festival is here, I can give the recipe a try.

I tried 2 recipes. Cake dough of the first one wasn’t very good, so I chucked it. It did provide a very good lotus seed paste recipe though, that’s the one I used here – not too sweet, and relatively less oil than commercial mooncakes. Jennifer found me another recipe for the dough that is much better. It’s funny that I misread the step oven time, but they actually turned out well! The recipe was modified below accordingly. I couldn’t find glucose and was too lazy to make my own, so I mixed golden syrup and molasses together. It worked for me just fine.
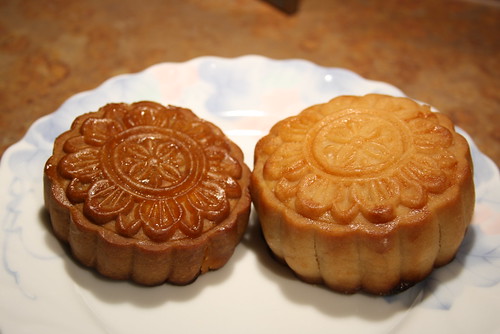

I used molesses only in the one on the left, I used golden syrup in the other


Lotus seed paste Adapted from 愛在廚房

Ingredients:
450g dried lotus seeds, peeled and centre removed
9 ½ cups water
300g sugar
300ml peanut oil (I used canola)
1 tbsp wheat starch

Directions:
Heat oil in small pot to hot but not smoking yet. Turn to low heat for 5 mins.
Remove pot from heat. Set aside and leave oil to room temperature.
Bring one pot of water to boil. Put lotus seeds for 5 mins. Lotus seeds should be easy to open after.
Drain and ensure all centres are removed (otherwise your paste will be bitter)
Add 9 ½ cups of water and cleaned lotus seeds to pot. Boil until lotus seeds are soft and easy to break when gently touched. There should be enough water left just to cover the seeds. If water is drying up quickly, add ½ cup of hot water, bring back to boil. Then turn off heat and cover with lid.
Pour water and lotus seeds to food processor, puree to smooth.
Put sieve above a non-stick frying pan. Press lotus seeds puree through sieve.
Stir fry puree on medium low heat to a sticky texture, add sugar, mix until incorporated.
Stir in oil little by little. Make sure oil is well absorbed before you add more.
Once all oil is mixed in, sieve over wheat starch and stir until well mixed.
Remove from heat and leave it cool to room temperature.

Cake dough Adapted from Chi Chi’s Kitchen

Ingredients
95g sifted cake flour
26g peanut oil (I used canola)
1-2g dietary alkali 食用鹼水
50g Lyle’s golden syrup
10g molasses

Directions:
Mix all ingredients together.
Leave it in the fridge for 1-2 hours.
Separate into balls of 45g each.
Roll each ball to as thin as you can, mine was about 1/16 inch thick.

I bought frozen salty egg yolks for the filling. Originally I bought 16 salty eggs, ended up with 7 usable yolks only. Luckily I found this place that sell frozen egg yolks only. It’s more expensive than buying the whole eggs but I won’t waste as much whites and the size is guaranteed. Sprinkled each yolk with some rice wine and cook them in toaster oven at 325C for 10 mins before using them.

Assembly and cooking directions:
Guidelines for lotus seed paste: Single yolk mooncake –100g, double yolk – 90g, no yolk – 110g
Cover each yolk with paste. Roll them into balls and wrap with thin cake dough.
Brush dough and inside of mould generously with cake flour.
Put dough in mould and press until you can’t press any further.
Release dough on parchment paper lined tray.
Evenly spray water on each cake and put in preheated 400C oven for 4 mins.
Brush with beaten egg and reduce oven temperature to 350C.
Bake for 12 mins.
Leave them cool to room temperature and put in a tightly sealed box for 1-2 days.
Dough will be softened after and ready to serve.

I made 21 moon cakes with 1 ½ times recipe of lotus seed paste and 4 times recipe of cake dough. Since there is less oil in these mooncakes than store bought ones, the paste tends to break apart easily. Make sure you press them well when wrapping the yolk and the dough has to stick well to the paste. When you compare mine with the mooncakes from stores, you’ll notice that their lotus seed paste looks almost like transparent. That’s because of their high oil content. Mine looks solid cream colour with light taste. I think that’s the difference between canola oil and peanut oil too.

So far the comments have been good. I’ll definitely make them again next year. I’ll make ice skin mooncake from Jennifer’s blog and will try sugarless lotus seed paste for my dad too.
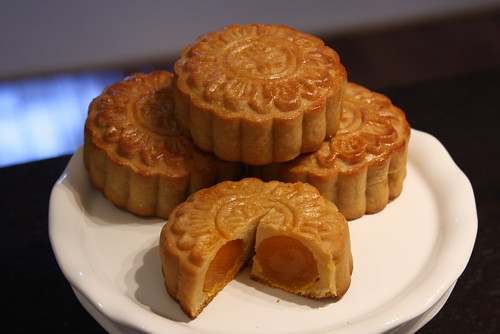

These cake doughs were made with Chi Chi's Kitchen recipe and mixed molasses and golden syrup


Sunday, April 17, 2011

chestnut bun (栗子包) / shredded pork bun (肉鬆包)


Ho has been sweeping all chestnut buns from a local bakery every time he saw them available there.  He asked me if I could make them at home.  After big success of the sausage buns, i don't see a problem with that.  Just that I don't have time to make the chestnut puree myself.  I told him if he could find the Hero canned chestnut puree for me, I would do it.  This is not an easy task as the only one store in the area which carries it has been out of stock for a long time.  It is not cheap either.  I was surprised that he loved the buns so much that he went to the store to check stock every other day.  He came home one day excitedly telling me that he bought 2 cans, the only 2 they had at the store.


I have to look after my kids' taste buds too.  So I made sausage buns again.  Then what about my taste buds?  I like shredded pork buns, I mixed 1 1/2 tablespoon of shredded pork with 2 teaspoons of mayo to fill the rolled out dough. Mmm...


For bread dough, follow my sausage buns recipe.

Chestnut filling -

Ingredients:

Method:
  1. Whisk egg yolk, vanilla, and cream in saucepan over low heat until thickened.
  2. Add to chestnut puree in large mixing bowl.
  3. Mix at high speed until smooth.
  4. Cover with plastic wrap.  Set aside until cool and ready to use.

Saturday, March 19, 2011

Milk Custard with Egg Whites 蛋白燉奶

Just when I was complaining having too much egg yolks in the fridge, I made this Chinese dessert with egg whites only again. My friend posted a picture of the one she made at home, it looks SOOO GOOOOD! Well, mind you, she uses Hokkaido 3.6% milk. While we don’t have that in Toronto, I’ll try with 2%. Less guilty to the body anyway.

It’s very easy to make.

Ingredients:
  • 200ml Milk
  • 2 tbsp sugar
  • 2 egg whites
Method:
  1. Melt sugar in milk with double boiler (or with a heat proof bowl on a pot of simmering water)
  2. Whisk whites to foamy stage
  3. Pour whites to milk mixture through a sieve to remove bubbles
  4. Mix well and pour everything to 2 bowls (you can pour through the sieve one more time)
  5. Cover bowls with aluminum foil and place in steamer.
  6. Steam with medium heat for 7-8 mins, low heat for 2 more mins.

 Livie actually cried because she did not have enough. I have to double the portion next time.

Tuesday, January 18, 2011

Pork Jerky 自製豬肉乾

We went to BSJ’s house for New Year’s Eve party after dinner. Even though I was quite full from dinner at my in-laws’, I could not resist trying the homemade beef jerky at the party. I didn't know it could be done at home. Ho LOVES pork jerky, oh I have to try that some time! Since I couldn’t wait to ask the friend how she made them, I went on the internet to search for the recipe. Bless the technology, I found several recipes with photos! Reading from the comments posted, the successful rate is quite high. The instructions are not complicated either. Thinking it would be a good CNY presents for families this weekend, I gave it a try.  LOL, after giving up my exercise and sleeping time to make these, I realized the CNY eve dinner is the weekend after!

2nd batch
Ingredients:
Ground pork 500g
Ham (minced) 100g
Sugar 85g (I reduced the sugar from original recipe)
Honey 1 big Tbsp
Fish Sauce (魚露) 2 Tbsp
Shaoxing Cooking Wine (紹興酒) 1 Tbsp
Vegetable Oil 1 Tbsp
White Pepper ½ Tsp (Optional)

Method:
  1. Preheat oven to 320F.
  2. Mix all ingredients in mixer for 2 mins.
  3. Put one big scoop of mixture on parchment paper lined baking sheet.
  4. Cover with plastic wrap and roll out to 3-4mm thick.
  5. Put in centre of the oven for 15 mins.
  6. Cut the pork into squares with pizza cutter.
  7. Set oven to grill on Hi, put the baking sheet in for 3 – 3.5 mins.
  8. Turn the jerky over and grill for 3 – 3.5 mins again.
  9. The colour will darken after.
Depending on your oven, the grilling time may vary.

Before it went in the oven for the first time

I followed the original recipe to pan sear the first batch.  They got burnt very quickly.  The picture below shows the ones I had left.  I decided to use the oven grill method in the second batch and they came out just right. Each batch yields about 30 pieces of 2” x 2” squares.


First batch, some burnt marks, actually more on the reverse side of some
 Ho is very happy that he doesn’t need to spend $$$ to buy pork jerky at the stores anymore. I spent only about 1/4 of the money to get the same quantity.  The taste is very close to what’s being sold at stores. Now that we can make them at home, we can adjust the saltiness and sweetness according to our preference too.

Thursday, December 9, 2010

Steamed Egg Custard Peach Shape Buns

I promised Mrs. Yip to make her egg custard bun (流沙奶黃包) for her birthday. I was going to make them in traditional peach shape buns to fit the celebration theme. As the post title explained, it didn’t work. The proofing and shaping was fine, but the dough rose so much in steaming process that they became gigantic buns.


I also made a little hedgehog for fun but since the dough was too thin, all the filling burst out from the spikes. It was such a brutal scene for the little animal that I didn’t bother to take pictures of him.  If I do take pictures, they will look a lot like those from the CSI tv show. Poor thing. Well, I’ll try another recipe next time. I'll make the dough thicker, hopefully I can get a healthy hedgehog from it. Since this bun didn't work, I made Cherry’s invention Lemon Ginger Bavarian Cream cake for Mrs. Yip instead.

Wednesday, October 20, 2010

Egg Custard Buns 奶皇餐包 & Sausage Buns 腸仔包


Wow, 腸仔包 post from Chi Chi's Kitchen looks very yummy, I want to try making them too! I checked the fridge, all I was missing was the sausage. Ho, who was out for a meeting, naturally became my delivery man. Traditional homemade bread tends to dry up quickly the next day. Since my Tang Zhong Toast gave me big confidence in the method, while I was waiting for Ho, I searched again for 湯種餐包 (Tang Zhong Bread) recipe because my skill is not advanced enough to make up my own. When Ho returned with the sausage, he asked me if I could make 奶皇餐包 Egg Custard Bun too. It's too late at night! I had to try it the following day. These pictures were taken on 2 different days.


When I took the sausage bun back to the office for breakfast, here are the reactions:
Is it fake?
You mean you made the sausage?
Wow, it’s so big that you can eat it for dinner.

Aren’t my colleagues nice? They were all guys. All my girl colleagues said, “It looks so pretty!”


I tried using the dough starter from my Tang Zhong Toast in Carol’s recipe. It made the dough too wet after baking. I had to stick to Carol’s original one. Even though it will be dense the next day, but once you reheat it in microwave, it’ll be soft and moist as long as you don’t put it in for too long.


Egg Custard Filling Ingredients:

(a) All Purpose Flour 15g
Corn Starch 15g
Vanilla Custard Powder 30g

(b) Evaporated Milk 130ml
Heavy Cream 170ml

(c) Egg Yolk 1pc

(d) Sugar 40g

Melted Butter 15g

Method:

  1. Sift (a) together, mix well.
  2. Add 5-6 tbsp of (b) mixture and mix until smooth.
  3. Add egg yolk. Stir until no white powder can be seen.
  4. Add (d), mix well.
  5. Put remaining (b) mixture to boil. Pour it to (4).
  6. Keep stirring until there's no more lumps. Steam mixture in a wide container for 20 - 25 mins.
  7. Leave it cool and knead with hand to a smooth dough.
  8. Take 280g from the filling and put the rest in refrigerator.
  9. Cut the filling into 8 pieces of 35g each. Make sure you don't press them too hard.
Bread dough Ingredients:

A) Tang Zhong / Dough Starter (This will make more than what you need in one batch)

Bread Flour 50g
Water 100ml
Milk 150ml

B) Main Dough

Bread Flour 230g
Cake Flour 70g
Sugar 30g
Instant Dry Yeast 1 - 1 1/2 tsp (see instructions below)
Salt 1/2 tsp
Egg 1pc
Water 15ml
Heavy Cream 80ml

Unsalted Butter 30g
Tang Zhong 100g

Method:

  1. Cook ingredients (A) in pot on low heat, whisk until a paste formed. Scrape it to a large mixing bowl.
  2. When (A) is cooled, add ingredients (B) excluding water and butter to the bowl of stand mixer. Start mixing. It will be very sticky.
  3. After everything well mixed, add water. Keep kneading until the water is evenly mixed in.
  4. Add butter. After kneading in high speed for 10 mins, all moisture should be absorbed and the dough should be smooth.
  5. Shape the dough into a ball, put it in a slightly greased bowl, seam side down. Cover with plastic and leave it in a warm place.
  6. After 50-60 mins, size of the dough should be about doubled. (If you are not in a hurry, use 1 tsp and flavour of flour will come out better, but it will take you at least 1 1/2 hrs for the size to double.) Punch it down and knead a few times on a lightly floured surface to remove bubbles.
  7. The dough should weigh about 600g. Separate it into 8 pieces of about 75g each.
  8. Sausage Roll: Shape small doughs into long strips of 25 cm long. Roll 3 rounds for each sausage end side down. Put them on parchment lined baking tray and cover with damp towel for second proof.
  9. Custard Bun: Shape small doughs into balls, cover with damp towel for second proof. After proofing, press dough to flat and put custard filling in centre, seal and shape into ball again. Put them on baking tray with sausage rolls.
  10. Brush proofed doughs with egg wash.
  11. Put tray in preheated 350F oven, middle rack for 18 - 20 mins.

After a few days, I made braided bread simply with the Tang Zhong toast recipe. It worked fine only without the taste of egg. I have to adjust the temperature and timing too. The bottom was a little dry. Oh well, another excuse for me to bake again!

Thursday, September 30, 2010

Chinese Style Coconut Pudding 棉花椰汁糕

Just found out  that I became a granny again last night.  My niece had her second baby yesterday.  Plus 3 kids from another niece, wow, I have 5 grand-nieces and nephews!  Since I'm an "old" lady now, it sounds appropriate for me to make the old Chinese dim sum - coconut pudding.

Another reason is, an aunt came from Hong Kong for a visit, and she LOVES this dessert.  Since she just had her 70th birthday last month, I promised to make one for her.


Somehow I don't see these old fashion dim sum in Chinese restaurants as often as before.  I consider this old fashion because the newer ones I had recently didn't have the same texture.  They're more like plain gelatin pudding.  I call mine "Cottony Coconut Pudding" 棉花椰汁糕 because it is as airy, soft and fluffy as cotton.


Here's what I did...

Ingredients:
  • 2 tbsp unflavoured gelatin
  • 1 3/8 cups water (1/2 cup cold, rest boiling)
  • 1 can of coconut milk (400 ml)
  • 1/2 cup sugar
  • 2 egg whites
Method:
  1. Get a 1 litre container ready.  Lightly grease it if you are going to flip out the pudding before serving.  Otherwise, use a container which you can cut the pudding in without scratching the container.
  2. In a small microwaveable bowl, dissolve gelatin with 1/2 cup of cold water.  Set aside for 5 mins.
  3. Microwave the gelatin mixture for 10-15 seconds. 
  4. Transfer to larger bowl, pour remaining boiling water to mix well.  (Step 2 avoid having lumps in gelatin mixture.)
  5. Add sugar, once it is dissolved, add coconut milk. Allow to cool to room temperature.
  6. Whip egg whites until soft peak.
  7. When gelatin is cooled to room temperature, place gelatin bowl in an ice bath.  
  8. When mixture begins to set*, fold egg whites into it.
  9. Spread in prepared dish and refrigerate until set.
*Note: If you prefer less airy texture, do not let the gelatin set for too long.  The closer to setting stage, the airier it will taste like.

Wednesday, September 22, 2010

Mid-Autumn (Moon Cake) Festival


A long time friend in Hong Kong found me through Facebook a few weeks ago.  Turned out that she's a homebaker too.  I always admire persistence of homebakers in HK.  They have relatively smaller space and small oven, yet they can do whatever we can do here.  Some of her "projects" look really professional.  Yet she'sso humble to say that they're not pretty, not up to the standard.  I think they're just fine.  She even made moon cakes and a Chinese puff pastry with salty egg yolk. Since she said it's easy to do, I gave the puff pastry 豆沙蛋黃酥 a try for Mid-Autumn Festival.
She's right!  It's quite easy to make.  It's very labour intensive though.  I made the dough last night, on my 8th anniversary night.  Haha...  I must be crazy.  One thing I don't like about this recipe is the taste of clarified butter.  It is so strong that it doesn't even smell like a Chinese dessert anymore.  However, this can easily be fixed by replacing it with vegetable shortening.  After making tang zhong toast so many times, I noticed that omega 3 eggs give less colour to baked goods.  This was exactly what happened to my pastry this time.  Unfortunately when I made these at my in-law's place, they only had one omega 3 eg left.  As you can see, they are as white as Chinese steamed buns.  That's ok, overall the project was still a success.  Ho was so happy with the result that he wanted to give them away to his friends right away.  Another excuse for him to go out to see his friends of course.  :-)

I haven't gotten time to translate the recipe yet, but here's the link to the original 蓮蓉蛋黃酥 recipe I followed.


Saturday, July 3, 2010

Mango Coconut Tapioca Drink (芒椰奶西)

At dinner time, Ho asked me, "Is it hard to make 芒椰奶西 Mango coconut tapioca?"  Jennifer and Francis were with us at the time, we all think that it shouldn't be that hard.  Basically the name of the dessert says it all.  So we paid a visit to grocery store to pick up the ingredients for our experiement.  As you can see from the pictures, it was a success.

Ingredients (serves 6):

1/4 cup tapioca

1 1/2 cup water

8 oz mango puree

10 oz coconut milk

1 cup icecubes

sugar to taste

Method:
  1. Bring water to boil.
  2. Pour in tapioca, boil for 5 mins.  Turn off heat and leave tapioca in hot water for 20 mins until the colour is clear.
  3. Rinse them in sieve under cold water.  Set aside.
  4. Mix mango puree, coconut milk and ice with blender.
  5. Taste, if necessary, add sugar and blend a few more seconds.
  6. Put one scoop of reserved tapioca in glass, pour mango mixture in and stir.
  7. Add a few mango cubes and drizzle extra coconut milk on top as garnishing.

It can easily turn  into 楊枝甘露 if you mix in pomelo bits.

Sunday, March 28, 2010

菜肉包 (Chinese Steamed Buns with Bok Choi and Pork Filling)

Not really a baking item but it's kind of a bread to me.  So I'm adding this with my other bread post in this category.  This picture shows the look before I put them in the steamer.  Since my kids love Hua Juan (花卷), I've been trying to look for a recipe for a long time.  I recently found this one online.  http://allrecipes.com/Recipe/Chinese-Steamed-Buns/Detail.aspx

When I was reading it, I thought, wouldn't it be nice if I could make that into a meal for Adrian to take to school for lunch.  So I decided to use the same dough recipe for 菜肉包.  Since I don't trust myself in marinating the pork.  I asked our nanny (she used to look after my kids before they went to school, now she comes once a week to help me cook and clean) to do it for me.  She told me that if I want the veggies to stay crunchy after being steamed, I had to marinate the veggies with salt first, then stir fry them before mixing with the pork for filling later.  Now that's something I couldn't learn from internet.  But there is one idea she suggested turned out to be a not so good one, which is adding garlic.  I think she added too much, so the filling tasted a bit too garlicky, or even somehow tasted like raw garlic.  I could tell the pork was cooked but...  strange taste.

The buns by themselves are fine.  My nanny actually asked me for the recipe because she liked it so much.  Here are some pictures of the making process:

I made 菜肉包 with most of the dough.

I also made Hua Juan 花卷.  I saw a picture online showing people to cut a few lines on a flattened dough, then twist it to make a Juan 卷.

After filling the buns, I let them proofed for the second time.  They look a lot bigger and the patterns I put on the seams are almost gone.

I don't have bamboo steamer at home but I do have a double layer steaming pot.  I wasn't sure if the buns would keep expanding, so I laid them out loosely apart.  See the Hua Juan 花卷 on the right hand side?

Here they are, steamed buns with and without filling.  My nanny said the ball shape one without filling cannot be called Man Tou 饅頭 because the texture should be different.  All I can call it is a 無料包, bun with no filling.


When I tore the one with filling apart, meat was juicy, bun looks ok too.  Yet like I mentioned before, the filling tasted overly garlicky, I couldn't taste the bun properly.

My son gave it a one thumb sideways, which means only ok for him.  So I tore the 無料包 bun with no filling to see.

Looks like the real thing at restaurant.  Not bad.  Taste was good too.  My kids were all anxiously waiting for the Huan Juan 花卷.  I gave it to them, of course with their favourite condensed milk for dipping.  Result is:


I find the recipe not enough to make 24 regular size buns.  I followed it diligently but got really small buns.  I'll increase the bun size next time.

Update:

I went to check the comments on original recipe, most people use the dough to make fewer buns.  I should have read them before making it.  I also heated the meat filled buns for lunch today at work.  The garlicky taste was not as strong.  Haha, maybe the garlic was not cooked through yesterday!  Yet the pork was cooked...  Well, I ate them already!