Showing posts with label Recipes. Show all posts

Sunday, September 18, 2011

Challah


My family loves to eat.  Every member enjoys cooking and all of them are really good cooks.  I think our taste buds were spoiled by my mom’s superb cooking skills, so we all developed the interest in eating good food.  I had a late start because my mom said I was too slow and was always in her way in the kitchen when I was little.  I didn’t pick up the skill until when I was studying at university away from home. My cooking is like kindergarten level when compared to those of my sis' and big bro's.  Even though my other bro doesn't cook much, but his wife cooks very well too.  What a lucky man!

We had a small family barbeque at Lily’s (my sis) house today.  By small I mean usually we would have close to 20 people whenever we had one, but this time my parents, big bro and sis-in-law are enjoying sunshine and beaches in Hawaii; hence we’re down to 12 counts only this time.  Lily and Berta (my other sis-in-law) already decided on most of the items on the menu, while worrying that we might have too much meat, I brought some zucchinis and a Challah for the barbeque.

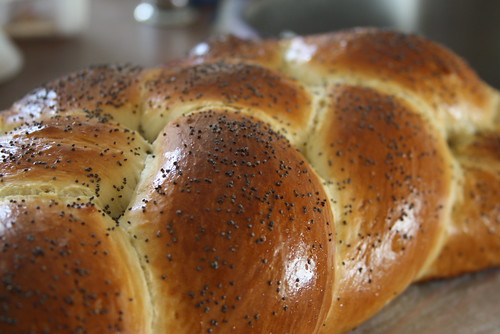
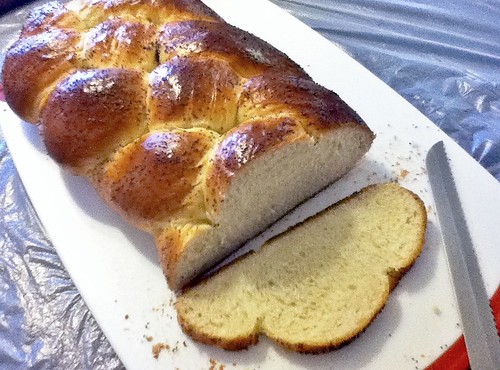
I know, as Cherry asked, why did I make Easter bread Challah in September?  My answer was, why not?  It’s a good looking tasty bread which fits for any time of year I’ll say.  It was huge, close to 17” long and weighed over 1.4kg.  We couldn’t finish it but everyone saved a few slices for themselves.  It’s a very easy recipe from William Sonoma.  Success guaranteed.

I also found some pictures showing simple steps to do a 4-strand braid for easy reference.  The link is included in the directions.

The recipe looks quite long in the original book.  Let me see if I can simplify it:


Ingredients:
  • 2 packages (5 tsp.) active dry yeast
  • 1 cup warm water (40 – 46C, slightly warm to touch)
  • 1/2 cup sugar
  • 3 eggs, plus 1 egg, beaten, for glaze
  • 780g or 5 cups all-purpose flour
  • 2 tsp. salt
  • ½ cup unsalted butter, at room
      temperature
  • 1 Tbs. poppy seeds or sesame seeds (optional)
Directions:

  1. In large mixing bowl, dissolve the yeast in the warm water and let stand until foamy, about 5 minutes.
  2. Add the sugar, 3 eggs, 4 1/2 cups of the flour, the salt and butter.  Knead until all ingredients are incorporated. 
  3. Add remaining flour as necessary to keep the dough from being too sticky, until the dough is smooth and elastic.  Do not add too much flour more than the amount on ingredients list. The dough should stay soft and will become less sticky with kneading. Remove the dough from the bowl.
  4. Form the dough into a ball and transfer it to a lightly oiled bowl. Cover the bowl with a damp kitchen towel and let the dough rise in a warm, draft-free spot until it doubles in bulk, about 2 hours.
  5. Line a large baking sheet with parchment paper. Punch down the dough. Using a plastic pastry scraper, scrape the dough out onto a clean work surface.  Cut the dough into 4 pieces.  Make each into a rope, each should be as long as the width of your baking sheet.
  6. Line the ropes horizontally on the lined baking sheet.  Follow the instructions from this link to do the braid.
  7. Repeat the braiding until you reach the ends of the ropes. Pinch them together at the top and at the bottom, and tuck the strands under at the ends.
  8. Cover the braided loaf with a dry kitchen towel, and let rise again in a warm, draft-free spot until the loaf doubles in size and is jiggly when you shake the sheet, 45 to 60 minutes.
  9. Position a rack in the lower third of an oven and preheat to 350°F.
  10. Brush the braid gently with the beaten egg and sprinkle with the seeds. Bake the braid until it is nicely browned and sounds hollow when tapped on the bottom, 30 to 35 minutes. Tip: Check after 20 mins, cover with foil if you see the loaf is browning too quickly. 
  11. Transfer to a wire rack and let cool completely. Makes 1 large braided loaf.
Wednesday, September 14, 2011

Mooncake Festival


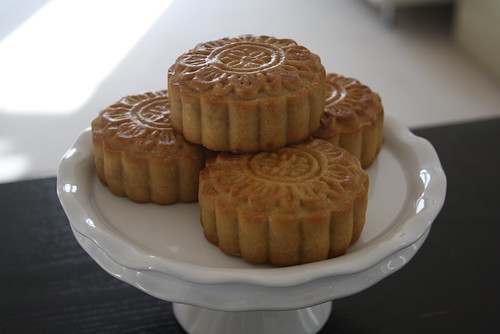
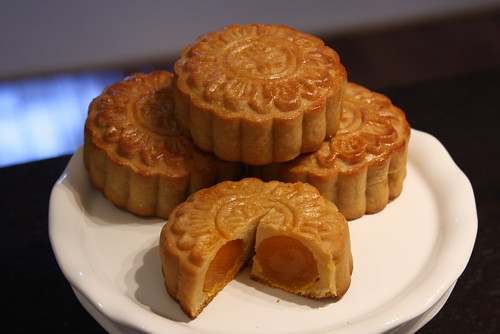
Saw my friend’s mooncakes last year on facebook. They look so pretty! I had this in my mind since then and bought a mould immediately. After keeping the mould in the kitchen for months, finally Mid-Autumn festival is here, I can give the recipe a try.

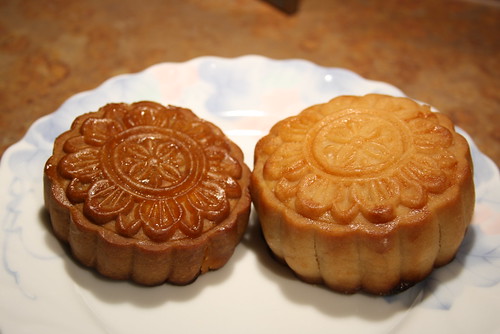
I tried 2 recipes. Cake dough of the first one wasn’t very good, so I chucked it. It did provide a very good lotus seed paste recipe though, that’s the one I used here – not too sweet, and relatively less oil than commercial mooncakes. Jennifer found me another recipe for the dough that is much better. It’s funny that I misread the step oven time, but they actually turned out well! The recipe was modified below accordingly. I couldn’t find glucose and was too lazy to make my own, so I mixed golden syrup and molasses together. It worked for me just fine.


I used molesses only in the one on the left, I used golden syrup in the other


Lotus seed paste Adapted from 愛在廚房

Ingredients:
450g dried lotus seeds, peeled and centre removed
9 ½ cups water
300g sugar
300ml peanut oil (I used canola)
1 tbsp wheat starch

Directions:
Heat oil in small pot to hot but not smoking yet. Turn to low heat for 5 mins.
Remove pot from heat. Set aside and leave oil to room temperature.
Bring one pot of water to boil. Put lotus seeds for 5 mins. Lotus seeds should be easy to open after.
Drain and ensure all centres are removed (otherwise your paste will be bitter)
Add 9 ½ cups of water and cleaned lotus seeds to pot. Boil until lotus seeds are soft and easy to break when gently touched. There should be enough water left just to cover the seeds. If water is drying up quickly, add ½ cup of hot water, bring back to boil. Then turn off heat and cover with lid.
Pour water and lotus seeds to food processor, puree to smooth.
Put sieve above a non-stick frying pan. Press lotus seeds puree through sieve.
Stir fry puree on medium low heat to a sticky texture, add sugar, mix until incorporated.
Stir in oil little by little. Make sure oil is well absorbed before you add more.
Once all oil is mixed in, sieve over wheat starch and stir until well mixed.
Remove from heat and leave it cool to room temperature.

Cake dough Adapted from Chi Chi’s Kitchen

Ingredients
95g sifted cake flour
26g peanut oil (I used canola)
1-2g dietary alkali 食用鹼水
50g Lyle’s golden syrup
10g molasses

Directions:
Mix all ingredients together.
Leave it in the fridge for 1-2 hours.
Separate into balls of 45g each.
Roll each ball to as thin as you can, mine was about 1/16 inch thick.

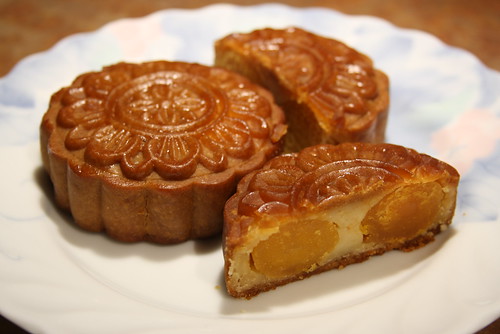
I bought frozen salty egg yolks for the filling. Originally I bought 16 salty eggs, ended up with 7 usable yolks only. Luckily I found this place that sell frozen egg yolks only. It’s more expensive than buying the whole eggs but I won’t waste as much whites and the size is guaranteed. Sprinkled each yolk with some rice wine and cook them in toaster oven at 325C for 10 mins before using them.

Assembly and cooking directions:
Guidelines for lotus seed paste: Single yolk mooncake –100g, double yolk – 90g, no yolk – 110g
Cover each yolk with paste. Roll them into balls and wrap with thin cake dough.
Brush dough and inside of mould generously with cake flour.
Put dough in mould and press until you can’t press any further.
Release dough on parchment paper lined tray.
Evenly spray water on each cake and put in preheated 400C oven for 4 mins.
Brush with beaten egg and reduce oven temperature to 350C.
Bake for 12 mins.
Leave them cool to room temperature and put in a tightly sealed box for 1-2 days.
Dough will be softened after and ready to serve.

I made 21 moon cakes with 1 ½ times recipe of lotus seed paste and 4 times recipe of cake dough. Since there is less oil in these mooncakes than store bought ones, the paste tends to break apart easily. Make sure you press them well when wrapping the yolk and the dough has to stick well to the paste. When you compare mine with the mooncakes from stores, you’ll notice that their lotus seed paste looks almost like transparent. That’s because of their high oil content. Mine looks solid cream colour with light taste. I think that’s the difference between canola oil and peanut oil too.

So far the comments have been good. I’ll definitely make them again next year. I’ll make ice skin mooncake from Jennifer’s blog and will try sugarless lotus seed paste for my dad too.


These cake doughs were made with Chi Chi's Kitchen recipe and mixed molasses and golden syrup


Sunday, April 17, 2011

chestnut bun (栗子包) / shredded pork bun (肉鬆包)


Ho has been sweeping all chestnut buns from a local bakery every time he saw them available there.  He asked me if I could make them at home.  After big success of the sausage buns, i don't see a problem with that.  Just that I don't have time to make the chestnut puree myself.  I told him if he could find the Hero canned chestnut puree for me, I would do it.  This is not an easy task as the only one store in the area which carries it has been out of stock for a long time.  It is not cheap either.  I was surprised that he loved the buns so much that he went to the store to check stock every other day.  He came home one day excitedly telling me that he bought 2 cans, the only 2 they had at the store.


I have to look after my kids' taste buds too.  So I made sausage buns again.  Then what about my taste buds?  I like shredded pork buns, I mixed 1 1/2 tablespoon of shredded pork with 2 teaspoons of mayo to fill the rolled out dough. Mmm...


For bread dough, follow my sausage buns recipe.

Chestnut filling -

Ingredients:

Method:
  1. Whisk egg yolk, vanilla, and cream in saucepan over low heat until thickened.
  2. Add to chestnut puree in large mixing bowl.
  3. Mix at high speed until smooth.
  4. Cover with plastic wrap.  Set aside until cool and ready to use.

Sunday, April 10, 2011

Crêpes


Usually we would only buy Häagen-Dazs ice cream when they are on sale, say 3x500g tubs for Cdn$10.  However, when we saw this new Lemon flavour with Half the Fat, we couldn't resist and bought it at regular price ($6.77 for a 500g tub).  To rub it in, the cashier lady told us that they were on sale at $2 a tub yesterday!  "I don't care!  I have to eat it now!" was what I had in mind when I paid.  We were crazy enough to ask for 2 spoons at MacDonald's to eat the ice cream in the car right away.  The taste is well worth the money.  I think it's the most refreshing flavour in the Häagen-Dazs brand.  I was delighted to see there was no single artificial ingredient in this product.  It probably will be the only ice cream which I'll ask for second. 
So, it became part of our breakfast this morning.  Yes, dessert for breakfast!  Fresh Strawberries Crêpe with Lemon Häagen-Dazs ice cream.  I heard Häagen-Dazs ice cream is very expensive in Hong Kong.  I wonder how much they'll charge for this plate.

Then, Ho came up with this chocolate lover's devil crêpe version: Toblerone Crêpe with chocolate syrup.


I also did a salty version with mayo and shredded pork which I didn't take a picture of.  As much as I like all these fillings, I do think the smooth yet light crêpes make a big difference.

Basic Crêpe (Adapted from All Recipes)

Ingredients

  • 1 cup all-purpose flour
  • 2 eggs
  • 1/2 cup milk
  • 1/2 cup water
  • 1/4 teaspoon salt
  • 2 tablespoons unsalted butter, melted

Directions

  1. In a large mixing bowl, whisk the eggs.  Sieve flour and add to the eggs . Gradually add in the milk, keep stirring. 
  2. Once all flour are covered with egg mixture, add water.  Use spatula to stir and press batter against side of bowl until combined.  
  3. Add the salt and butter; beat until smooth.  
  4. Press batter through sieve while transferring the batter to another bowl.
  5. Heat a lightly oiled griddle or frying pan over medium high heat. Pour or scoop the batter onto the griddle, using approximately 1/4 cup for each crepe. Tilt the pan with a circular motion so that the batter coats the surface evenly.
  6. Cook the crêpe for about 2 minutes, until the bottom is light brown. Loosen with a spatula, turn and cook the other side. Serve hot.

Saturday, March 19, 2011

Milk Custard with Egg Whites 蛋白燉奶

Just when I was complaining having too much egg yolks in the fridge, I made this Chinese dessert with egg whites only again. My friend posted a picture of the one she made at home, it looks SOOO GOOOOD! Well, mind you, she uses Hokkaido 3.6% milk. While we don’t have that in Toronto, I’ll try with 2%. Less guilty to the body anyway.

It’s very easy to make.

Ingredients:
  • 200ml Milk
  • 2 tbsp sugar
  • 2 egg whites
Method:
  1. Melt sugar in milk with double boiler (or with a heat proof bowl on a pot of simmering water)
  2. Whisk whites to foamy stage
  3. Pour whites to milk mixture through a sieve to remove bubbles
  4. Mix well and pour everything to 2 bowls (you can pour through the sieve one more time)
  5. Cover bowls with aluminum foil and place in steamer.
  6. Steam with medium heat for 7-8 mins, low heat for 2 more mins.

 Livie actually cried because she did not have enough. I have to double the portion next time.

Monday, February 21, 2011

Restaurant Grade Gourmet Bread in 45 mins


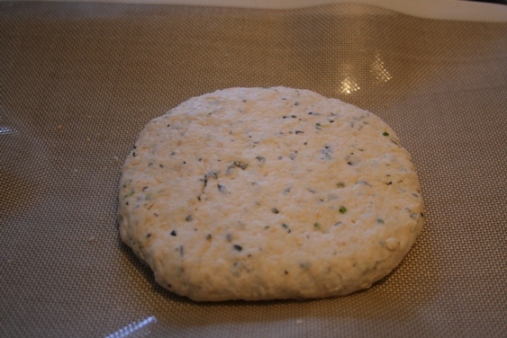
I meant 45 mins from the time you measure your ingredients to taking the bread out of the oven. Yes, ONLY 45 mins. There’s no proofing and kneading involved. Hmm, the bread burst with fresh herb flavour, I felt like sitting in a nice restaurant when the waiter serves the basket of assorted gourmet bread in front of me. It’s super easy to make. I highly recommend it.

Cheddar-Herb Quick Bread Recipe adapted from Inspired Magazine from Sobeys

• 1 tbsp lemon juice
• 1 cup milk
• 2 ¼ cups all purpose Flour
• 1 cup shredded old cheddar cheese
• ¼ cup assorted fresh herbs (I used sage, chives, and oregano)
• ¾ tsp each baking powder and baking soda
• ½ tsp salt
• 2 tbsp unsalted butter, cold, finely cubed

Method:
  1. Preheat oven to 375F (190C).
  2. Make sour milk by stirring lemon juice to milk. Let it stand for 5 mins.
  3. Blend flour with cheese, herbs, baking powder, baking soda, and salt in a large bowl until well combined.
  4. Cut in butter until crumbly using a pastry blender or two knives. (I used my fingers, make sure you don’t let the butter melt in your hands)
  5. Add milk mixture and stir just until a ragged dough forms.
  6. Knead lightly, about 10 times. (Oops, I lied, there is some kneading involved, just minimal though)
  7. The dough will be sticky but once all dry ingredients are mixed in with the liquid, it won’t stick.
  8. Transfer dough to a parchment or silpad lined baking sheet and pat into a 1” thick dish.
  9. Dust the top of the loaf with a little additional flour (I missed this part) and score a large “X” (about ¼” deep) using a sharp paring knife. Bake for 30 mins or until golden and a toothpick inserted into the centre comes out clean. Transfer to a rack and let it cool for about 5 mins before slicing.

There’s no yeast in the ingredients, that’s why there’s no proofing required. The crust was crispy when it first came out from the oven. I may brush the top with egg white next time and spray water in the oven to create a thicker crust. It’s still very good if you eat it fresh from the oven though.

Tuesday, January 18, 2011

Pork Jerky 自製豬肉乾

We went to BSJ’s house for New Year’s Eve party after dinner. Even though I was quite full from dinner at my in-laws’, I could not resist trying the homemade beef jerky at the party. I didn't know it could be done at home. Ho LOVES pork jerky, oh I have to try that some time! Since I couldn’t wait to ask the friend how she made them, I went on the internet to search for the recipe. Bless the technology, I found several recipes with photos! Reading from the comments posted, the successful rate is quite high. The instructions are not complicated either. Thinking it would be a good CNY presents for families this weekend, I gave it a try.  LOL, after giving up my exercise and sleeping time to make these, I realized the CNY eve dinner is the weekend after!

2nd batch
Ingredients:
Ground pork 500g
Ham (minced) 100g
Sugar 85g (I reduced the sugar from original recipe)
Honey 1 big Tbsp
Fish Sauce (魚露) 2 Tbsp
Shaoxing Cooking Wine (紹興酒) 1 Tbsp
Vegetable Oil 1 Tbsp
White Pepper ½ Tsp (Optional)

Method:
  1. Preheat oven to 320F.
  2. Mix all ingredients in mixer for 2 mins.
  3. Put one big scoop of mixture on parchment paper lined baking sheet.
  4. Cover with plastic wrap and roll out to 3-4mm thick.
  5. Put in centre of the oven for 15 mins.
  6. Cut the pork into squares with pizza cutter.
  7. Set oven to grill on Hi, put the baking sheet in for 3 – 3.5 mins.
  8. Turn the jerky over and grill for 3 – 3.5 mins again.
  9. The colour will darken after.
Depending on your oven, the grilling time may vary.

Before it went in the oven for the first time

I followed the original recipe to pan sear the first batch.  They got burnt very quickly.  The picture below shows the ones I had left.  I decided to use the oven grill method in the second batch and they came out just right. Each batch yields about 30 pieces of 2” x 2” squares.


First batch, some burnt marks, actually more on the reverse side of some
 Ho is very happy that he doesn’t need to spend $$$ to buy pork jerky at the stores anymore. I spent only about 1/4 of the money to get the same quantity.  The taste is very close to what’s being sold at stores. Now that we can make them at home, we can adjust the saltiness and sweetness according to our preference too.

Saturday, January 15, 2011

French Baguette


Ever since Ho started working from home, he has more time to stay home. Recently he started to make dinner for us sometimes too. Me and our kids are happy enough to see daddy at dinner time, now he even cooks for us! That’s too good to be true. I remember the days when we could only have dinner with him once or twice in weeknights, maybe once in the weekends, plus he had to work during the day on weekends too. I really felt like a single mom at that time. Now I have my husband back.

Tonight Auntie D is coming over for dinner. Ho took the head chef role again. He made Carrot Butter Squash soup (from the can), Smoke Salmon Pizzettes (Food Network Chef Giada recipe), beef tenderloin with crispy prosciutto (French Food At Home recipe), and Avocado Salad with self created dressing. Livie tried to help by rolling out the pizza dough with me. I turned around to do some cleaning and when I went back to the counter, this was what I saw. Thanks for helping, Livie…


Since it was late when the food was ready, we were all so hungry that the food went in our stomach before I had a chance to take pictures. I did make the effort to take picture of my French baguette though. The steam from the freshly baked bread got me so excited but the camera couldn’t catch the steam in the photo at all.


Here's the recipe.  I have added a few more steps to produce a baguette with a crunchier crust:

Homemade Crusty French Baguette (Adapted from my favourite All Recipes site)

Ingredients:

* 1 cup water
* 2 1/2 cups bread flour
* 1 tablespoon white sugar
* 1 teaspoon salt
* 1 1/2 teaspoons quick rise yeast
* 1 egg white

Directions:
  1. Place 1 cup water, bread flour, sugar, salt and yeast into mixer bowl and mix for 10 mins.
  2. Shape the dough into a ball and place it in a greased bowl, turning to coat all sides. Cover, and let rise in a warm place for about 30 minutes, or until doubled in bulk. Dough is ready if indentation remains when touched.
  3. Punch down dough. On a lightly floured surface, roll into a 16x12 inch rectangle. Cut dough in half, creating two 8x12 inch rectangles. Roll up each half of dough tightly, beginning at 12 inch side, pounding out any air bubbles as you go. Roll gently back and forth to taper end. Place 3 inches apart on a greased cookie sheet. Make deep diagonal slashes across loaves every 2 inches, or make one lengthwise slash on each loaf. Cover, and let rise in a warm place for 30 to 40 minutes, or until doubled in bulk.
  4. Preheat oven to 375 degrees F (190 degrees C) with an empty cake/pie pan at bottom rack.
  5. Put shaped dough on top of pizza stone.
  6. Brush egg white over tops of loaves and slide it on centre rack.
  7. Pour 1/4 cup of hot water into the empty cake pan and close oven door quickly. (Be careful with your hand and face, the steam will rise instantly)
  8. In process of baking, once the water in cake pan is dried up, add another 1/4 cup of hot water again or simply spray water in the oven.  If you choose to spray, you may need to spray again before the bread is ready.
  9. Bake for 20 to 25 minutes in the preheated oven, or until golden brown.
I forgot to brush the dough with egg white so they look more like bread stick, but the crust was very crispy already.


You can put the completely cooled baguettes in the freezer and reheat it in the oven at 350F for 5-7 minutes.  Fresh baguette in the morning!

Monday, November 8, 2010

My Closest to Sara Lee Pound Cake


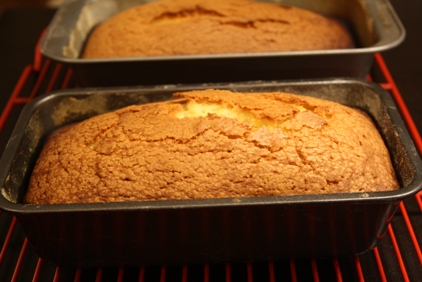
Have you ever felt that you really need to do something regardless how tired you are? With baking, I get this all the time. Tonight I had that feeling again. My husband loves Sara Lee pound cake but I had been searching every site to find the close enough recipe. After copying recipes from dozens of sites, I don’t recall where I got this one anymore but it’s supposed to be an improved version of Elvis’ favourite pound cake recipe. At the same time I wanted to compare the Rose Levy and traditional mixing method. Therefore, I made a double batch making one load with Rose Levy’s one bowl method. It’s supposed to reduce gluten formation in flour to create the melt in your mouth texture.


After the comparison, I like the traditional method more. It might be me, who didn’t do the mixing properly, but Rose’s batter came out quite thick and big holes were trapped in the cake (pictures above), while the traditional method gave me a dense yet smooth cake (pictures at top of the post). Other than holes, as you can tell from my pictures here, there’s not much difference in the texture. From this exercise I also realized the importance of “sifting flour 3 times”. The flour weighed less every time after I sifted it. Hence, the recipe I’m posting here is the weight I measured after sifting the flour thoroughly.

Ingredients:
1 cup unsalted butter (2 sticks)
3 cups granulated sugar
405g all-purpose flour (Sifted 3 times)
1 teaspoon baking powder
1 teaspoon salt
5 large eggs + 1 yolk
2 teaspoons vanilla
1 cup whipping cream

Method:
1. Butter and flour 2 9by5 inch loaf pans.
2. Sift flour, baking powder and salt together. Set aside.
3. Beat together butter and sugar in a large bowl with an electric mixer at medium-high speed until pale and fluffy, about 5 minutes in a stand mixer fitted with paddle attachment or 6 to 8 minutes with a handheld mixer.
4. Add eggs 1 at a time, beating well after each addition
5. Beat in vanilla.
6. Reduce speed to low and add half of flour, then cream, then remaining flour, mixing well after each addition.
7. Scrape down side of bowl, beat at medium-high speed 5 minutes. Batter will become creamier and satiny.
8. Pour batter in 2 loaf pans and put them in COLD oven at 325F for 1 hour – 1 hour 20 mins.

Thursday, October 28, 2010

Banana Banana Bread

Daniel is leaving us!

Daniel is a sweet boy. He joined the company about 2 years ago after he graduated from university. I was helping out at another position at the time and that position was split into 2 jobs later. He was hired to do one of those 2 jobs. Naturally I was the one to train him. I sat with him everyday within his first 2 weeks in the company. He’s like a little brother to me. It’s funny that another coworker who sits beside him wrote on the farewell card saying that Daniel is like her second son. Daniel, you are a family to everyone! Everybody likes him. Therefore, when he asked me if I could make him a banana bread, he got what he wanted.


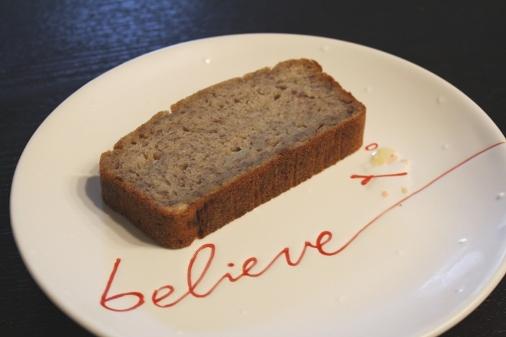
I had never had success in making banana bread before. I don’t usually eat it so I don’t know how it’s supposed to be like. However, when 5,500 people said it’s a good recipe, I’ll take their word for it. It is a heavy loaf. Heavy in weight but not heavy in taste. In fact the fruit flavor was very refreshing. There is so much banana in the recipe that it is called "Banana Banana Bread". It is not a typo in my post title. Yet I would reduce the banana a little to 2 cups next time because I found some of them sunk to the bottom. I couldn't whisk the batter further as I didn’t want to overmix the batter. Otherwise it might harden the texture and make it dry too.


Recipe adapted from All Recipes

Ingredients
• 2 cups all-purpose flour
• 1 teaspoon baking soda
• ½ tsp baking powder
• 1/4 teaspoon salt
• 1/2 cup butter
• 1/2 cup brown sugar
• 2 eggs, beaten
• 2 cups mashed overripe bananas

Directions
1. Preheat oven to 325 degrees F. Lightly grease a 9x5 inch loaf pan.
2. In a large bowl, combine flour, baking soda and salt. In a separate bowl, cream together butter and brown sugar. Stir in eggs and mashed bananas until well blended. Stir banana mixture into flour mixture; stir just to moisten. Pour batter into prepared loaf pan.
3. Bake in preheated oven for 65 - 70 minutes, until a toothpick inserted into center of the loaf comes out clean. Let bread cool in pan for 10 minutes, then turn out onto a wire rack.

Wednesday, October 20, 2010

Egg Custard Buns 奶皇餐包 & Sausage Buns 腸仔包


Wow, 腸仔包 post from Chi Chi's Kitchen looks very yummy, I want to try making them too! I checked the fridge, all I was missing was the sausage. Ho, who was out for a meeting, naturally became my delivery man. Traditional homemade bread tends to dry up quickly the next day. Since my Tang Zhong Toast gave me big confidence in the method, while I was waiting for Ho, I searched again for 湯種餐包 (Tang Zhong Bread) recipe because my skill is not advanced enough to make up my own. When Ho returned with the sausage, he asked me if I could make 奶皇餐包 Egg Custard Bun too. It's too late at night! I had to try it the following day. These pictures were taken on 2 different days.


When I took the sausage bun back to the office for breakfast, here are the reactions:
Is it fake?
You mean you made the sausage?
Wow, it’s so big that you can eat it for dinner.

Aren’t my colleagues nice? They were all guys. All my girl colleagues said, “It looks so pretty!”


I tried using the dough starter from my Tang Zhong Toast in Carol’s recipe. It made the dough too wet after baking. I had to stick to Carol’s original one. Even though it will be dense the next day, but once you reheat it in microwave, it’ll be soft and moist as long as you don’t put it in for too long.


Egg Custard Filling Ingredients:

(a) All Purpose Flour 15g
Corn Starch 15g
Vanilla Custard Powder 30g

(b) Evaporated Milk 130ml
Heavy Cream 170ml

(c) Egg Yolk 1pc

(d) Sugar 40g

Melted Butter 15g

Method:

  1. Sift (a) together, mix well.
  2. Add 5-6 tbsp of (b) mixture and mix until smooth.
  3. Add egg yolk. Stir until no white powder can be seen.
  4. Add (d), mix well.
  5. Put remaining (b) mixture to boil. Pour it to (4).
  6. Keep stirring until there's no more lumps. Steam mixture in a wide container for 20 - 25 mins.
  7. Leave it cool and knead with hand to a smooth dough.
  8. Take 280g from the filling and put the rest in refrigerator.
  9. Cut the filling into 8 pieces of 35g each. Make sure you don't press them too hard.
Bread dough Ingredients:

A) Tang Zhong / Dough Starter (This will make more than what you need in one batch)

Bread Flour 50g
Water 100ml
Milk 150ml

B) Main Dough

Bread Flour 230g
Cake Flour 70g
Sugar 30g
Instant Dry Yeast 1 - 1 1/2 tsp (see instructions below)
Salt 1/2 tsp
Egg 1pc
Water 15ml
Heavy Cream 80ml

Unsalted Butter 30g
Tang Zhong 100g

Method:

  1. Cook ingredients (A) in pot on low heat, whisk until a paste formed. Scrape it to a large mixing bowl.
  2. When (A) is cooled, add ingredients (B) excluding water and butter to the bowl of stand mixer. Start mixing. It will be very sticky.
  3. After everything well mixed, add water. Keep kneading until the water is evenly mixed in.
  4. Add butter. After kneading in high speed for 10 mins, all moisture should be absorbed and the dough should be smooth.
  5. Shape the dough into a ball, put it in a slightly greased bowl, seam side down. Cover with plastic and leave it in a warm place.
  6. After 50-60 mins, size of the dough should be about doubled. (If you are not in a hurry, use 1 tsp and flavour of flour will come out better, but it will take you at least 1 1/2 hrs for the size to double.) Punch it down and knead a few times on a lightly floured surface to remove bubbles.
  7. The dough should weigh about 600g. Separate it into 8 pieces of about 75g each.
  8. Sausage Roll: Shape small doughs into long strips of 25 cm long. Roll 3 rounds for each sausage end side down. Put them on parchment lined baking tray and cover with damp towel for second proof.
  9. Custard Bun: Shape small doughs into balls, cover with damp towel for second proof. After proofing, press dough to flat and put custard filling in centre, seal and shape into ball again. Put them on baking tray with sausage rolls.
  10. Brush proofed doughs with egg wash.
  11. Put tray in preheated 350F oven, middle rack for 18 - 20 mins.

After a few days, I made braided bread simply with the Tang Zhong toast recipe. It worked fine only without the taste of egg. I have to adjust the temperature and timing too. The bottom was a little dry. Oh well, another excuse for me to bake again!

Saturday, October 2, 2010

Another Baby Shower


I was invited to another baby shower for 2 mommies-to-be. Strangely, one of the mommies is bringing the main courses, the other mommy is also bringing food too. This is a non-traditional shower, but hey, friends gatherings are always enjoyable, who cares what it’s called?

I have a busy schedule today. Chocolate class finishes at 12 noon, 1pm is the shower, 2:45pm kids’ art class starts, 4:30pm is my long time White Rose friend’s wedding in Vaughan. Oh, Linda looked so pretty in her wedding gown! I can tell Linda spent so much time in planning this. You can tell that she a perfectionist from the wedding favours she made for her guest. She designed the invitation card, program book, she hand wrapped and tied the gifts one by one, I think she made the ornament herself too. The wedding was perfect! Every one of the hundred guests participated in the games and we all had fun. Too bad I forgot my camera at home. It was a beautiful wedding.


So I ended up managed to go to every event. It’s a busy day, but I enjoyed every part of it.
This was the cake I brought to baby shower in the afternoon. It’s a Japanese cheesecake loved by one of the mommies and host of the party. I love it when I don’t have to guess whether the audience will like what I make or not. I had not made this for awhile, still as good as I remember it was.

Adapted from Food.com
SERVES 6 -8
• 7 ounces cream cheese, at room temperature
• 1/4 cup whole milk
• 1/2 cup superfine sugar (I reduced it to 1/3 cup because I also reduced lemon juice in the recipe)
• 3 eggs, separated
• 1/4 cup cornstarch
• 1/2 tablespoon lemon juice
• 1/2 teaspoon cream of tartar
• 2 1/2 cups boiling water
1. Preheat oven to 350 degrees.
2. Spray a 8-inch cake tin with cooking oil spray.
3. Beat cream cheese with milk to soften.
4. Add half of the sugar, egg yolks, cornstarch and lemon juice.
5. Beat until smooth.
6. Beat egg whites in a separate bowl until foamy.
7. Gradually add remaining sugar and cream of tartar, beating on high speed until soft peaks form, about 8-10 minutes.
8. Gradually fold beaten egg whites into the cream cheese mixture, stirring gently.
9. Pour into cake pan and smooth the surface.
10. Place cake pan into a larger roasting pan and place in lower rack of oven.
11. Pour enough water into the roasting pan to come half way up the side of the cake pan.
12. Bake 35-40 minutes, until a pick inserted in the middle of the center comes out clean.
13. If the surface becomes too dark while baking cover with a piece of tin foil, but be careful not to open the oven door until it has been in the oven for at least 20 minutes.
14. Let it cool in the oven with the door ajar by sticking a wooden spoon at the opening. You can leave it overnight.