Showing posts with label Bread. Show all posts

Sunday, September 18, 2011

Challah


My family loves to eat.  Every member enjoys cooking and all of them are really good cooks.  I think our taste buds were spoiled by my mom’s superb cooking skills, so we all developed the interest in eating good food.  I had a late start because my mom said I was too slow and was always in her way in the kitchen when I was little.  I didn’t pick up the skill until when I was studying at university away from home. My cooking is like kindergarten level when compared to those of my sis' and big bro's.  Even though my other bro doesn't cook much, but his wife cooks very well too.  What a lucky man!

We had a small family barbeque at Lily’s (my sis) house today.  By small I mean usually we would have close to 20 people whenever we had one, but this time my parents, big bro and sis-in-law are enjoying sunshine and beaches in Hawaii; hence we’re down to 12 counts only this time.  Lily and Berta (my other sis-in-law) already decided on most of the items on the menu, while worrying that we might have too much meat, I brought some zucchinis and a Challah for the barbeque.

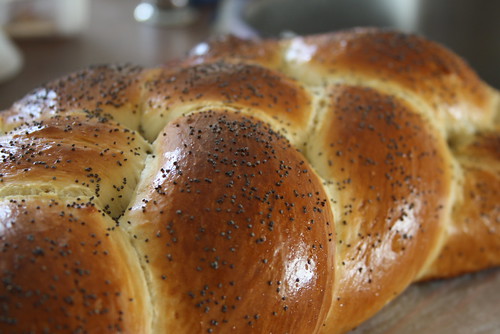
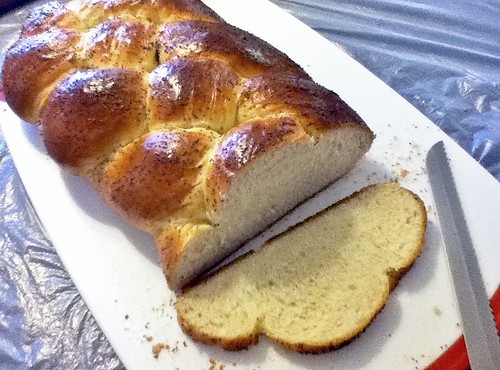
I know, as Cherry asked, why did I make Easter bread Challah in September?  My answer was, why not?  It’s a good looking tasty bread which fits for any time of year I’ll say.  It was huge, close to 17” long and weighed over 1.4kg.  We couldn’t finish it but everyone saved a few slices for themselves.  It’s a very easy recipe from William Sonoma.  Success guaranteed.

I also found some pictures showing simple steps to do a 4-strand braid for easy reference.  The link is included in the directions.

The recipe looks quite long in the original book.  Let me see if I can simplify it:


Ingredients:
  • 2 packages (5 tsp.) active dry yeast
  • 1 cup warm water (40 – 46C, slightly warm to touch)
  • 1/2 cup sugar
  • 3 eggs, plus 1 egg, beaten, for glaze
  • 780g or 5 cups all-purpose flour
  • 2 tsp. salt
  • ½ cup unsalted butter, at room
      temperature
  • 1 Tbs. poppy seeds or sesame seeds (optional)
Directions:

  1. In large mixing bowl, dissolve the yeast in the warm water and let stand until foamy, about 5 minutes.
  2. Add the sugar, 3 eggs, 4 1/2 cups of the flour, the salt and butter.  Knead until all ingredients are incorporated. 
  3. Add remaining flour as necessary to keep the dough from being too sticky, until the dough is smooth and elastic.  Do not add too much flour more than the amount on ingredients list. The dough should stay soft and will become less sticky with kneading. Remove the dough from the bowl.
  4. Form the dough into a ball and transfer it to a lightly oiled bowl. Cover the bowl with a damp kitchen towel and let the dough rise in a warm, draft-free spot until it doubles in bulk, about 2 hours.
  5. Line a large baking sheet with parchment paper. Punch down the dough. Using a plastic pastry scraper, scrape the dough out onto a clean work surface.  Cut the dough into 4 pieces.  Make each into a rope, each should be as long as the width of your baking sheet.
  6. Line the ropes horizontally on the lined baking sheet.  Follow the instructions from this link to do the braid.
  7. Repeat the braiding until you reach the ends of the ropes. Pinch them together at the top and at the bottom, and tuck the strands under at the ends.
  8. Cover the braided loaf with a dry kitchen towel, and let rise again in a warm, draft-free spot until the loaf doubles in size and is jiggly when you shake the sheet, 45 to 60 minutes.
  9. Position a rack in the lower third of an oven and preheat to 350°F.
  10. Brush the braid gently with the beaten egg and sprinkle with the seeds. Bake the braid until it is nicely browned and sounds hollow when tapped on the bottom, 30 to 35 minutes. Tip: Check after 20 mins, cover with foil if you see the loaf is browning too quickly. 
  11. Transfer to a wire rack and let cool completely. Makes 1 large braided loaf.
Sunday, April 17, 2011

chestnut bun (栗子包) / shredded pork bun (肉鬆包)


Ho has been sweeping all chestnut buns from a local bakery every time he saw them available there.  He asked me if I could make them at home.  After big success of the sausage buns, i don't see a problem with that.  Just that I don't have time to make the chestnut puree myself.  I told him if he could find the Hero canned chestnut puree for me, I would do it.  This is not an easy task as the only one store in the area which carries it has been out of stock for a long time.  It is not cheap either.  I was surprised that he loved the buns so much that he went to the store to check stock every other day.  He came home one day excitedly telling me that he bought 2 cans, the only 2 they had at the store.


I have to look after my kids' taste buds too.  So I made sausage buns again.  Then what about my taste buds?  I like shredded pork buns, I mixed 1 1/2 tablespoon of shredded pork with 2 teaspoons of mayo to fill the rolled out dough. Mmm...


For bread dough, follow my sausage buns recipe.

Chestnut filling -

Ingredients:

Method:
  1. Whisk egg yolk, vanilla, and cream in saucepan over low heat until thickened.
  2. Add to chestnut puree in large mixing bowl.
  3. Mix at high speed until smooth.
  4. Cover with plastic wrap.  Set aside until cool and ready to use.

Monday, February 21, 2011

Restaurant Grade Gourmet Bread in 45 mins


I meant 45 mins from the time you measure your ingredients to taking the bread out of the oven. Yes, ONLY 45 mins. There’s no proofing and kneading involved. Hmm, the bread burst with fresh herb flavour, I felt like sitting in a nice restaurant when the waiter serves the basket of assorted gourmet bread in front of me. It’s super easy to make. I highly recommend it.

Cheddar-Herb Quick Bread Recipe adapted from Inspired Magazine from Sobeys

• 1 tbsp lemon juice
• 1 cup milk
• 2 ¼ cups all purpose Flour
• 1 cup shredded old cheddar cheese
• ¼ cup assorted fresh herbs (I used sage, chives, and oregano)
• ¾ tsp each baking powder and baking soda
• ½ tsp salt
• 2 tbsp unsalted butter, cold, finely cubed

Method:
  1. Preheat oven to 375F (190C).
  2. Make sour milk by stirring lemon juice to milk. Let it stand for 5 mins.
  3. Blend flour with cheese, herbs, baking powder, baking soda, and salt in a large bowl until well combined.
  4. Cut in butter until crumbly using a pastry blender or two knives. (I used my fingers, make sure you don’t let the butter melt in your hands)
  5. Add milk mixture and stir just until a ragged dough forms.
  6. Knead lightly, about 10 times. (Oops, I lied, there is some kneading involved, just minimal though)
  7. The dough will be sticky but once all dry ingredients are mixed in with the liquid, it won’t stick.
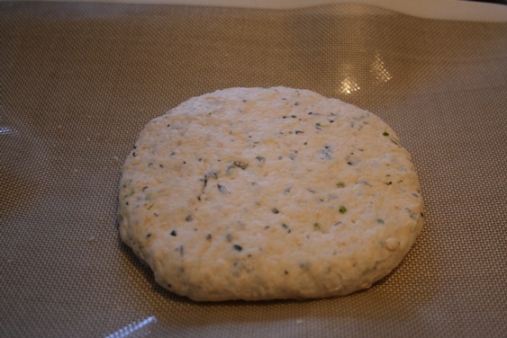
  8. Transfer dough to a parchment or silpad lined baking sheet and pat into a 1” thick dish.
  9. Dust the top of the loaf with a little additional flour (I missed this part) and score a large “X” (about ¼” deep) using a sharp paring knife. Bake for 30 mins or until golden and a toothpick inserted into the centre comes out clean. Transfer to a rack and let it cool for about 5 mins before slicing.

There’s no yeast in the ingredients, that’s why there’s no proofing required. The crust was crispy when it first came out from the oven. I may brush the top with egg white next time and spray water in the oven to create a thicker crust. It’s still very good if you eat it fresh from the oven though.

Saturday, January 15, 2011

French Baguette


Ever since Ho started working from home, he has more time to stay home. Recently he started to make dinner for us sometimes too. Me and our kids are happy enough to see daddy at dinner time, now he even cooks for us! That’s too good to be true. I remember the days when we could only have dinner with him once or twice in weeknights, maybe once in the weekends, plus he had to work during the day on weekends too. I really felt like a single mom at that time. Now I have my husband back.

Tonight Auntie D is coming over for dinner. Ho took the head chef role again. He made Carrot Butter Squash soup (from the can), Smoke Salmon Pizzettes (Food Network Chef Giada recipe), beef tenderloin with crispy prosciutto (French Food At Home recipe), and Avocado Salad with self created dressing. Livie tried to help by rolling out the pizza dough with me. I turned around to do some cleaning and when I went back to the counter, this was what I saw. Thanks for helping, Livie…


Since it was late when the food was ready, we were all so hungry that the food went in our stomach before I had a chance to take pictures. I did make the effort to take picture of my French baguette though. The steam from the freshly baked bread got me so excited but the camera couldn’t catch the steam in the photo at all.


Here's the recipe.  I have added a few more steps to produce a baguette with a crunchier crust:

Homemade Crusty French Baguette (Adapted from my favourite All Recipes site)

Ingredients:

* 1 cup water
* 2 1/2 cups bread flour
* 1 tablespoon white sugar
* 1 teaspoon salt
* 1 1/2 teaspoons quick rise yeast
* 1 egg white

Directions:
  1. Place 1 cup water, bread flour, sugar, salt and yeast into mixer bowl and mix for 10 mins.
  2. Shape the dough into a ball and place it in a greased bowl, turning to coat all sides. Cover, and let rise in a warm place for about 30 minutes, or until doubled in bulk. Dough is ready if indentation remains when touched.
  3. Punch down dough. On a lightly floured surface, roll into a 16x12 inch rectangle. Cut dough in half, creating two 8x12 inch rectangles. Roll up each half of dough tightly, beginning at 12 inch side, pounding out any air bubbles as you go. Roll gently back and forth to taper end. Place 3 inches apart on a greased cookie sheet. Make deep diagonal slashes across loaves every 2 inches, or make one lengthwise slash on each loaf. Cover, and let rise in a warm place for 30 to 40 minutes, or until doubled in bulk.
  4. Preheat oven to 375 degrees F (190 degrees C) with an empty cake/pie pan at bottom rack.
  5. Put shaped dough on top of pizza stone.
  6. Brush egg white over tops of loaves and slide it on centre rack.
  7. Pour 1/4 cup of hot water into the empty cake pan and close oven door quickly. (Be careful with your hand and face, the steam will rise instantly)
  8. In process of baking, once the water in cake pan is dried up, add another 1/4 cup of hot water again or simply spray water in the oven.  If you choose to spray, you may need to spray again before the bread is ready.
  9. Bake for 20 to 25 minutes in the preheated oven, or until golden brown.
I forgot to brush the dough with egg white so they look more like bread stick, but the crust was very crispy already.


You can put the completely cooled baguettes in the freezer and reheat it in the oven at 350F for 5-7 minutes.  Fresh baguette in the morning!

Thursday, December 9, 2010

Steamed Egg Custard Peach Shape Buns

I promised Mrs. Yip to make her egg custard bun (流沙奶黃包) for her birthday. I was going to make them in traditional peach shape buns to fit the celebration theme. As the post title explained, it didn’t work. The proofing and shaping was fine, but the dough rose so much in steaming process that they became gigantic buns.


I also made a little hedgehog for fun but since the dough was too thin, all the filling burst out from the spikes. It was such a brutal scene for the little animal that I didn’t bother to take pictures of him.  If I do take pictures, they will look a lot like those from the CSI tv show. Poor thing. Well, I’ll try another recipe next time. I'll make the dough thicker, hopefully I can get a healthy hedgehog from it. Since this bun didn't work, I made Cherry’s invention Lemon Ginger Bavarian Cream cake for Mrs. Yip instead.

Wednesday, October 20, 2010

Egg Custard Buns 奶皇餐包 & Sausage Buns 腸仔包


Wow, 腸仔包 post from Chi Chi's Kitchen looks very yummy, I want to try making them too! I checked the fridge, all I was missing was the sausage. Ho, who was out for a meeting, naturally became my delivery man. Traditional homemade bread tends to dry up quickly the next day. Since my Tang Zhong Toast gave me big confidence in the method, while I was waiting for Ho, I searched again for 湯種餐包 (Tang Zhong Bread) recipe because my skill is not advanced enough to make up my own. When Ho returned with the sausage, he asked me if I could make 奶皇餐包 Egg Custard Bun too. It's too late at night! I had to try it the following day. These pictures were taken on 2 different days.


When I took the sausage bun back to the office for breakfast, here are the reactions:
Is it fake?
You mean you made the sausage?
Wow, it’s so big that you can eat it for dinner.

Aren’t my colleagues nice? They were all guys. All my girl colleagues said, “It looks so pretty!”


I tried using the dough starter from my Tang Zhong Toast in Carol’s recipe. It made the dough too wet after baking. I had to stick to Carol’s original one. Even though it will be dense the next day, but once you reheat it in microwave, it’ll be soft and moist as long as you don’t put it in for too long.


Egg Custard Filling Ingredients:

(a) All Purpose Flour 15g
Corn Starch 15g
Vanilla Custard Powder 30g

(b) Evaporated Milk 130ml
Heavy Cream 170ml

(c) Egg Yolk 1pc

(d) Sugar 40g

Melted Butter 15g

Method:

  1. Sift (a) together, mix well.
  2. Add 5-6 tbsp of (b) mixture and mix until smooth.
  3. Add egg yolk. Stir until no white powder can be seen.
  4. Add (d), mix well.
  5. Put remaining (b) mixture to boil. Pour it to (4).
  6. Keep stirring until there's no more lumps. Steam mixture in a wide container for 20 - 25 mins.
  7. Leave it cool and knead with hand to a smooth dough.
  8. Take 280g from the filling and put the rest in refrigerator.
  9. Cut the filling into 8 pieces of 35g each. Make sure you don't press them too hard.
Bread dough Ingredients:

A) Tang Zhong / Dough Starter (This will make more than what you need in one batch)

Bread Flour 50g
Water 100ml
Milk 150ml

B) Main Dough

Bread Flour 230g
Cake Flour 70g
Sugar 30g
Instant Dry Yeast 1 - 1 1/2 tsp (see instructions below)
Salt 1/2 tsp
Egg 1pc
Water 15ml
Heavy Cream 80ml

Unsalted Butter 30g
Tang Zhong 100g

Method:

  1. Cook ingredients (A) in pot on low heat, whisk until a paste formed. Scrape it to a large mixing bowl.
  2. When (A) is cooled, add ingredients (B) excluding water and butter to the bowl of stand mixer. Start mixing. It will be very sticky.
  3. After everything well mixed, add water. Keep kneading until the water is evenly mixed in.
  4. Add butter. After kneading in high speed for 10 mins, all moisture should be absorbed and the dough should be smooth.
  5. Shape the dough into a ball, put it in a slightly greased bowl, seam side down. Cover with plastic and leave it in a warm place.
  6. After 50-60 mins, size of the dough should be about doubled. (If you are not in a hurry, use 1 tsp and flavour of flour will come out better, but it will take you at least 1 1/2 hrs for the size to double.) Punch it down and knead a few times on a lightly floured surface to remove bubbles.
  7. The dough should weigh about 600g. Separate it into 8 pieces of about 75g each.
  8. Sausage Roll: Shape small doughs into long strips of 25 cm long. Roll 3 rounds for each sausage end side down. Put them on parchment lined baking tray and cover with damp towel for second proof.
  9. Custard Bun: Shape small doughs into balls, cover with damp towel for second proof. After proofing, press dough to flat and put custard filling in centre, seal and shape into ball again. Put them on baking tray with sausage rolls.
  10. Brush proofed doughs with egg wash.
  11. Put tray in preheated 350F oven, middle rack for 18 - 20 mins.

After a few days, I made braided bread simply with the Tang Zhong toast recipe. It worked fine only without the taste of egg. I have to adjust the temperature and timing too. The bottom was a little dry. Oh well, another excuse for me to bake again!

Monday, August 23, 2010

Tang Zhong Toast 湯種吐司/ Tang Zhong Cinnamon Rolls湯種玉桂卷


The reason why I had been so busy these days was Tang Zhong (湯種) toast bread.  Ever since I had tried it, I couldn’t stop.  My kids love it.  My husband, for the first time, even said it’s comparable to those of J-Town.  So I don’t buy bread from stores anymore.  Yet the bread is so popular that I have to bake quite often to keep up with the demand. This recipe was written in Chinese.  Jennifer just reminded me that I hadn't posted the English recipe yet.  Here it is:

Ingredients:

A) Dough starter (Tang Zhong)
  • Bread flour         20g
  • Water               80ml
  • Unsalted butter  10g
  • Salt                  ¼ tsp

B) Milk              130ml

C) Dough
  • Bread flour         300g
  • Milk powder       15g
  • Sugar                25g
  • Instant yeast     1 ½ tsp
  • Salt                  ¼ tsp
  • Water               20 – 30ml
  • Unsalted butter  20g (room temperature)

 Instructions:
  1. Cook ingredients (A) in pot on low heat, whisk until a paste formed. Scrape it to a large mixing bowl.
  2. Add ingredient (B) to cool the temperature.
  3. Add ingredients (C) excluding water and butter to the bowl.  Start mixing.  It will be very sticky.
  4. After everything well mixed, add water.  Keep kneading until the water is evenly mixed in.
  5. Add butter. After kneading in the bowl for about 30 times, all moisture should be absorbed and the dough should be smooth.
  6. Take it to a floured surface and keep kneading for 10 more minutes.
  7. Shape the dough into a ball, put it in a slightly greased bowl, seam side down.  Cover with plastic and leave it in a warm place.
  8. After 50-60 mins, size of the dough should be about doubled.  Punch it down and knead a few times on a lightly floured surface again to remove bubbles.
  9. Put the dough in a greased 9” x 5” loaf pan.  Press it down.  Wait for second proof rising up to about the height of the loaf pan.
  10. Brush with egg wash and put it in preheated 390F oven, middle rack for 25 mins.*

 *Check in 3 mins, cover top of the bread with foil.  Otherwise it will burn.


Recently from Happy Home Baking, I also found a different tang zhong recipe for cinnamon rolls.   She made it sound so easy, and it was!  Just roll out the dough to 9" x 13" after first proof.  Brush with melted butter and sprinkle with cinnamon (1 tsp) and brown sugar (30g)  mixture.  Roll, cut, arrange in pan with cut side up.  Brush top with more butter and cinnamon sugar mixtre, then wait for second proof.  Then it's baking time.  That's it!  My house smells like a bakery almost everyday.  They are so soft!  Oh no, I’m supposed to be on a low carb diet!


Sunday, June 27, 2010

Double Cheese Kolaches


It's sleepover day for Jennifer and Francis at our house.  Poor them didn't get much sleep because Adrian and Livie slept in middle of their beds.  So uncle and auntie had to sleep on the coach.  I was going to make big breakfast at home but celebrating D's birthday at karaoke went really late last night.  No time for grocery shopping.  I still wouldn't give up.  I started the bread dough early but who am I kidding?  There's no way to have this bread ready...  but I started it already...  So I went to pick up Mr. M's big breakfast for them and got some cheese on my way to complete this bread.

This is a great recipe from Canadian Living.  Yet I forgot to put salt in the dough.  Someone on the internet suggested making a paste with salt, flour, and water and knead it in the finished dough.  It worked!  The bread come out fine.  Just that because we had to go to see the Toy Story 3 movie, I couldn't stay at home till the end of the baking time.  Luckily our nanny was home to do our weekly cleaning, so she took it out for me.    I think the bread was left in the pan for too long.  It dried up a little, but it's still very good.

http://www.canadianliving.com/food/double_cheese_kolaches.php


Saturday, June 26, 2010

Oatmeal Molasses Bread


Now that the breakfast bread class is over, I feel so lost on Saturday morning.  Looking at Jennifer's olive bread, I want to make a loaf of bread too.  I flipped through my William Sonoma baking book on Friday night, I picked the whole wheat bread as my Saturday morning project.  So I measured all the ingredients before I went to bed so I could have a quick start the next day.  However, when I woke up in the morning, my fingers "took" me to this page of Oatmeal bread.  It looks so nice in the picture...  Well, we can always change our mind, right?  So I poured everything back in and do my measuring again...

Saturday, June 12, 2010

Coffee Cake – Breakfast Bread Week #6


I had better results on the coffee cakes.  I don’t understand why they would call them “cakes” since they look very “bread” to me.  Anyhow, they taste fantastic and very rarely my husband, who’s very diligent in cutting sweets now, asked me to leave the marzipan coffee cake at home.


A side view of the marzipan coffee cake/bread.

Bagel - Breakfast Bread Week #5


Since the instructor will not be available next week, she combined 2 classes into one.  We made bagels and coffee cakes in the 4-hour class.  Of course we went overtime.  What a hectic class!  Yet I think this is a better arrangement because otherwise class doing bagels only would be too short with a lot of waiting time.


This is my first time making bagels so I didn’t know I had to press on the poppy seeds before the final proof.  Most of my poppy seeds fell out!   Cherry said my bagels looked like dirty belly buttons.  That kind of spoiled the appetite, didn’t it?  The picture shown above has the most poppy seeds left.


Yet the bagels are very soft inside.  I’m glad that I chose to make cinnamon raisin bagels.  They’re great!  (At least the raisins didn’t fall out… J)