Showing posts with label Cake. Show all posts

Saturday, April 9, 2011

Course Final Project


This was the cake i decorated 2 weeks ago in the final class of Cake Decorating Course I.  I had learned a lot from this course.  It's hard to imagine myself piping roses, daisies, apple blossoms, daffodils, and all those beautiful flowers before taking the course.  It was so much fun too.  Too bad they don't have course II offered on Saturday morning, otherwise I would definitely take that too.  They do fondant in that course!  Maybe, it is time to take a break because I had been attending baking class almost non-stop since January last year.  I can spend my Saturday morning with my kids now.  Cherry is taking Course II, hmm... I can use some private tutorial from her.


Sunday, March 20, 2011

Change in Plan - Fruit Cream Cake


I felt bad for not having a special cake for my brother’s birthday. Even though the one he cut was beautifully decorated by Cherry at class, my brother thought the buttercream we used was too sweet.  (Not Cherry's fault of course because she only makes perfect cakes!)  I was going to make him a Boston Cream Cake but my pastry cream didn’t pass the storage test and water started to seep out. What can I do? In my pantry I have peaches in a can; in the fridge I have blueberries, raspberries and whipping cream… A simple fruit cream cake it is now.

I had lady fingers in my original design, they can be used with this cake too. They helped a lot because my masking skill is terrible. I used the shortest time to assemble the cake together. When I took the cake to the restaurant, feeling quite satisfied with the cake, my mom looked at it and said, “It’s SO UGLY!” She was not joking, because she hates grapes and anything that looks like grapes. Urgh! Yup, blueberries are lookalike of grapes to her. Luckily, seems like nobody agreed with her. Is it really that ugly?


Everybody focused on the taste. The cake finished quite quickly, that’s a good sign.

Friday, February 18, 2011

Champagne Cupcakes with Champagne Buttercream


On Thursday a colleague in the company kitchen asked me how my baking classes went.  I told her that I didn't bake as much now because I was only taking cake decorating class now.  She said, "Oh, I was gonna ask you if you would bake me a cake because it will be my birthday on Saturday."  She has been very nice to me all along.  I didn't want to disappoint her...  Ah... I have just the right recipe for her!

 
The original recipe used a very sweet buttercream but I like the Martha Stewart Swiss Meringue one more.  I brought 16 cupcakes to work.  2 saved for the birthday lady, rest for others.  People loved them!  They couldn't wait for the cupcakes to go back to room temperature before eating them and asked me for the recipe immediately after eating them.  It's funny one of them told me that she loved the hardness and softness of the buttercream because the buttercream hardened when it just came out from the fridge yet it melted immediately in the mouth.  That's why it's both hard and soft. 

 
Update: Here's the recipe...

Champagne Cupcake Ingredients: (20 cupcakes)

• 2 3/4 cups all-purpose flour
• 3 tsp. baking powder
• 1 tsp. salt
• 2/3 cup butter
• 1 1/2 cups white sugar
• 3/4 – 1 cup champagne (I used Asti only)
• 6 egg whites

Marth Stewart’s Swiss Meringue Champagne Buttercream Ingredients(5 cups)
• 1 1/4 cups sugar
• 5 large egg whites
• 2 cups unsalted butter, cut into pieces
• 3/4 teaspoons pure vanilla extract
• 4 tbsp champagne

 
Directions:

To Make The Cupcakes:
  1. Preheat oven to 350 degrees F (175 degrees C). Prepare a cupcake pan with liners. (This recipe yielded about 20 for me.)
  2. In a large bowl, cream together butter and sugar until very light and fluffy. Sift flour, baking powder, and salt together, and then blend into creamed mixture alternately with champagne. The batter will be thick but it’s ok.
  3. In another large clean bowl, beat egg whites until stiff peaks form. Fold 1/3 of the whites into batter to lighten it, then fold in remaining egg whites. Fill the cupcake liners about 2/3 full.
  4. Bake at 350 degrees F (175 degrees C) for 20 minutes, or until a toothpick inserted into the cake comes out clean.
To Make The Buttercream:

1. Place sugar and egg whites in the heat-proof bowl of an electric mixer. Set bowl over a pan of gently simmering water, and whisk until sugar has dissolved and egg whites are hot to the touch, about 3 minutes. Test by rubbing the mixture between your fingers; it should feel completely smooth.
2. Transfer bowl to mixer stand. Using the whisk attachment, beat on high speed until mixture has cooled completely and formed stiff and glossy peaks, about 8 minutes.
3. Add the butter, one piece at a time, and beat until incorporated after each addition. Don't worry if the buttercream appears curdled after all the butter has been added; it will become smooth again with continued beating. Add vanilla, and beat just until combined.
4. Switch to the paddle attachment, and beat on the lowest speed to eliminate any air pockets, about 2 minutes.
5. Add champagne and beat until fully mixed. If using buttercream within several hours, cover bowl with plastic wrap, and set aside at room temperature in a cool environment. Or transfer to an airtight container, and store in the refrigerator, up to 3 days. Before using, bring buttercream to room temperature, and beat on the lowest speed with the paddle attachment until smooth, about 5 minutes.


Talking about cake decorating, I've learned so much.  Here are some photo's of some roses and the first cake I decorated in the fifth class.


Sunday, December 12, 2010

Lemon Ginger Bavarian Cream


Cherry's Ginger Bavarian Cream cake made for Diana's birthday wowed me.  It looked very pretty, very professional looking.  I wasn't going to make it so soon because somehow I thought I had to save up the courage to do it.  Now since my custard buns didn't work out for Mrs. Yip, I had a good reason to try making it, a lot earlier than my plan.

The cake is easy to make but assembly is hard, especially when my loose bottom cake pan is thicker than Cherry's. She gave me detailed instructions on how to put the cake together already, but I still had to modify it a bit to fit my thick cake pan.  Livie wasn't feeling well today so the two of us couldn't go to the dinner.  Without me being there to look after the cake, a lot of the lemon mousse was squeezed out when Ho cut it up.  I think the problem was in the mousse, it was not thick enough.  You can see the lemon mousse became very thin from the picture below. Room for improvement again!
 

Saturday, November 20, 2010

Caramel Pecan Coffee Cake

From my chocolate class I had some caramel pecans left. Sally, who was assisting in the class that day, suggested me to use them up in a coffee cake. So I did! The cake looks very pretty by itself when I baked it in a Bundt pan. I was a little worried when I mixed in the egg and yogurt in the creamed butter and sugar. The batter looked really lumpy. Luckily, the cake turned out really nice. I reduced the sugar a lot because the caramel was quite sweet already. Everybody likes the cake, some went for second too.

Recipes adapted from All Recipes

Ingredients:
• 2 cups all-purpose flour
• 1/4 teaspoon salt
• 1 tablespoon baking powder
• 1 cup butter, softened
• 1 cup light yogurt
• 1 cup white sugar
• 2 eggs
• 1 tablespoon vanilla extract (reduce if you are using vanilla yogurt)
• 1/3 cup caramel
• 1/2 cup chopped pecans

Method:
1. Preheat oven to 350 degrees F. Grease Bundt pan with vegetable oil or cooking spray. Sift together the flour, baking powder, and salt; set aside.
2. In a large bowl, cream the butter and sugar until light and fluffy. Gradually beat in yogurt. Beat in the eggs one at a time, then stir in the vanilla. By hand, fold in the flour mixture, mixing just until incorporated. Spread half of the batter into prepared pan.
3. Combine caramel with pecans. Arrange the mixture on top of the batter. Do not get too close to the sides, otherwise the cake will split when you flip it out.
4. Spread remaining batter on top.
5. Bake in the preheated oven for 55 to 60 minutes, or until a toothpick inserted into the center of the cake comes out clean. Let cool in pan for 10 minutes, then turn out onto a wire rack.
6. Dust with icing sugar for presentation.

Or you can replace caramel with ¼ cup of brown sugar, ½ tsp of cinnamon, and 1-1.5 tbsp of melted butter to mix with pecan for filling.

Sunday, November 14, 2010

Hazelnut Cappuccino Cream Cake

Today is celebration of our dear friends V’s and L’s birthdays. I previously promised L that I would make him a Chestnut Mont Blanc but Hero chestnut puree was out of stock in all stores I checked. Since I purchased hazelnut flour online with my almond flour order recently, and I have always liked the Hazelnut Cappuccino flavour, I decided to make it again. However, I was too tired to do anything else after my Chocolate class yesterday morning, plus the run around from chestnut search, I fell asleep early before I could work on the cake. It was a good move because I had no idea the next day would be so hectic.


After weekly Sunday dim sum with my mom, I picked up buttermilk on my way back home to make the cake. I’ve been wondering if I need to toast hazelnut flour a bit (like what I did when making it from whole hazelnut) before adding it to my recipe. Unfortunately I didn’t have the luxury of time and I sifted it in without the toasting part. Either I didn’t put enough hazelnut flour or I should have toasted it first, I couldn’t taste the nut at all. Luckily I added some caramelized hazelnut on top, otherwise, it would become a simple coffee cream cake. I was so much in a rush that the cream was not whipped to stiff enough stage to support the cake long. Therefore I volunteered to serve the cake. Otherwise, it would have fallen apart. Looked pretty though. Cake texture was moist and spongy. I’ll try it again with toasted hazelnut flour again.

Monday, November 8, 2010

My Closest to Sara Lee Pound Cake


Have you ever felt that you really need to do something regardless how tired you are? With baking, I get this all the time. Tonight I had that feeling again. My husband loves Sara Lee pound cake but I had been searching every site to find the close enough recipe. After copying recipes from dozens of sites, I don’t recall where I got this one anymore but it’s supposed to be an improved version of Elvis’ favourite pound cake recipe. At the same time I wanted to compare the Rose Levy and traditional mixing method. Therefore, I made a double batch making one load with Rose Levy’s one bowl method. It’s supposed to reduce gluten formation in flour to create the melt in your mouth texture.


After the comparison, I like the traditional method more. It might be me, who didn’t do the mixing properly, but Rose’s batter came out quite thick and big holes were trapped in the cake (pictures above), while the traditional method gave me a dense yet smooth cake (pictures at top of the post). Other than holes, as you can tell from my pictures here, there’s not much difference in the texture. From this exercise I also realized the importance of “sifting flour 3 times”. The flour weighed less every time after I sifted it. Hence, the recipe I’m posting here is the weight I measured after sifting the flour thoroughly.

Ingredients:
1 cup unsalted butter (2 sticks)
3 cups granulated sugar
405g all-purpose flour (Sifted 3 times)
1 teaspoon baking powder
1 teaspoon salt
5 large eggs + 1 yolk
2 teaspoons vanilla
1 cup whipping cream

Method:
1. Butter and flour 2 9by5 inch loaf pans.
2. Sift flour, baking powder and salt together. Set aside.
3. Beat together butter and sugar in a large bowl with an electric mixer at medium-high speed until pale and fluffy, about 5 minutes in a stand mixer fitted with paddle attachment or 6 to 8 minutes with a handheld mixer.
4. Add eggs 1 at a time, beating well after each addition
5. Beat in vanilla.
6. Reduce speed to low and add half of flour, then cream, then remaining flour, mixing well after each addition.
7. Scrape down side of bowl, beat at medium-high speed 5 minutes. Batter will become creamier and satiny.
8. Pour batter in 2 loaf pans and put them in COLD oven at 325F for 1 hour – 1 hour 20 mins.

Friday, October 22, 2010

Green Tea Tofu No Bake Cheesecake


Made this for my friend Angel’s birthday. I was going to make Japanese Cheesecake but when I mentioned Japanese, Vincent asked, “Is it green tea?” Oh, ok, I’ll give it a try. I followed a couple of recipes but I was not happy with the texture. It’s too late to buy a cake, so my poor group of friends became my guinea pigs again. They were all very nice and polite when they said, “It’s a good cake”. They didn’t complain… (in front of me). Adrian was honest, as usual. He said, “It’s the worst cake I’ve ever had!” To be fair, the taste is not that bad. Since he loves cheese, he can’t relate green tea with cheesecake. I do agree there is lots of room for improvement though. Sorry Angel!

Saturday, October 16, 2010

Introduction to Chocolate (Part I)


After the Art of Cakes – Classic to Modern, I told myself, “I need a break! No more baking class in the next 6 months!" Then Cherry asked me if I wanted to take Introduction to Chocolate with her. Do I really like chocolate? I’m not a chocolate fan, but I do want to use chocolate to decorate my cakes sometimes. I struggled a little bit before asking Ho for his “blessing”. After a series of “please, please, please…”, he asked, “Are you really going to take a break after this class?” I said, “… maybe I can take Cake Decorating next year.” Heehee… we’ll see about that.

So, here I am, taking a professional course at Geroge Brown – Introduction to Chocolate. When I read the syllabus, it gave me a nice surprise. Not only do they temper chocolate to make decorations, they utilize the method to make all sorts of cakes and desserts. I love this course! There are a lot of first timers at GB in this course, Cherry and I, being in the 4th course, should be more experienced comparatively… but no, we failed in the first 2 weeks! Luckily this course is not graded. The chocolate ganache cake and cranberry almond bark were all a mess! The cake fell apart, the bark became a bulk of chocolate and we had to cut them in cubes! Luckily our confidence came back when we did the chocolate dipped biscotti and strawberries, the truffles were successful too, whew! The course is really hard!


Saturday, October 2, 2010

Another Baby Shower


I was invited to another baby shower for 2 mommies-to-be. Strangely, one of the mommies is bringing the main courses, the other mommy is also bringing food too. This is a non-traditional shower, but hey, friends gatherings are always enjoyable, who cares what it’s called?

I have a busy schedule today. Chocolate class finishes at 12 noon, 1pm is the shower, 2:45pm kids’ art class starts, 4:30pm is my long time White Rose friend’s wedding in Vaughan. Oh, Linda looked so pretty in her wedding gown! I can tell Linda spent so much time in planning this. You can tell that she a perfectionist from the wedding favours she made for her guest. She designed the invitation card, program book, she hand wrapped and tied the gifts one by one, I think she made the ornament herself too. The wedding was perfect! Every one of the hundred guests participated in the games and we all had fun. Too bad I forgot my camera at home. It was a beautiful wedding.


So I ended up managed to go to every event. It’s a busy day, but I enjoyed every part of it.
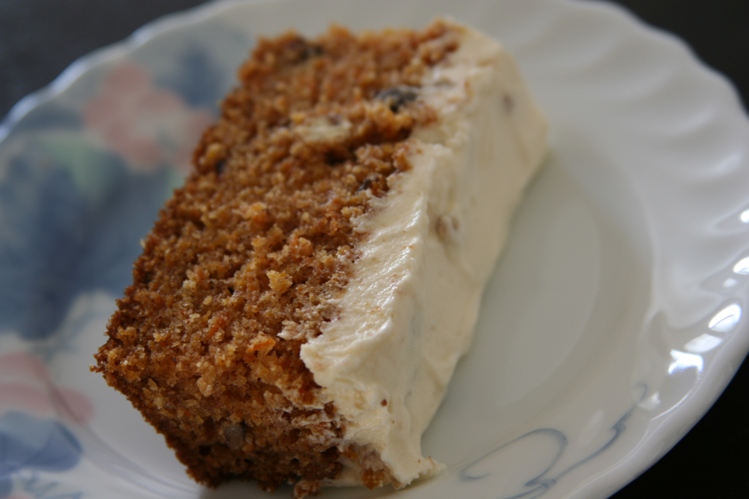
This was the cake I brought to baby shower in the afternoon. It’s a Japanese cheesecake loved by one of the mommies and host of the party. I love it when I don’t have to guess whether the audience will like what I make or not. I had not made this for awhile, still as good as I remember it was.

Adapted from Food.com
SERVES 6 -8
• 7 ounces cream cheese, at room temperature
• 1/4 cup whole milk
• 1/2 cup superfine sugar (I reduced it to 1/3 cup because I also reduced lemon juice in the recipe)
• 3 eggs, separated
• 1/4 cup cornstarch
• 1/2 tablespoon lemon juice
• 1/2 teaspoon cream of tartar
• 2 1/2 cups boiling water
1. Preheat oven to 350 degrees.
2. Spray a 8-inch cake tin with cooking oil spray.
3. Beat cream cheese with milk to soften.
4. Add half of the sugar, egg yolks, cornstarch and lemon juice.
5. Beat until smooth.
6. Beat egg whites in a separate bowl until foamy.
7. Gradually add remaining sugar and cream of tartar, beating on high speed until soft peaks form, about 8-10 minutes.
8. Gradually fold beaten egg whites into the cream cheese mixture, stirring gently.
9. Pour into cake pan and smooth the surface.
10. Place cake pan into a larger roasting pan and place in lower rack of oven.
11. Pour enough water into the roasting pan to come half way up the side of the cake pan.
12. Bake 35-40 minutes, until a pick inserted in the middle of the center comes out clean.
13. If the surface becomes too dark while baking cover with a piece of tin foil, but be careful not to open the oven door until it has been in the oven for at least 20 minutes.
14. Let it cool in the oven with the door ajar by sticking a wooden spoon at the opening. You can leave it overnight.

Monday, September 13, 2010

Carrot Cake


One of my team members loves carrot cake.  I always joke with him when he spends almost $3 to buy a slice of carrot cake from the coffee shop downstairs of the office.  He's a Muslim and he had to do fasting for one month recently.  I promised him that I would bake a carrot cake for him when his fasting was over.  This is a 9" x 13" cake. I was hoping others in the office could enjoy it too.  When I asked him to bring some back for his wife, he actually cut quite a big piece.  I could tell how much he liked carrot cake.  This recipe was taken from Allrecipes.com.  There were almost 80,000  people saved the recipe and more than 2,800 people gave high rating on it.  Can't go wrong with that.  It was indeed very easy and very tasty.  I also replaced half of the oil with apple sauce and reduced the sugar in icing from 4 cups to less than 1.5 cups.  They're perfect match.  Many coworkers at the office emailed me to thank me for making this delicious cake.

Here's my adaptation of the recipe:

Ingredients

  • 4 eggs
  • 3/4 cups vegetable oil
  • 1/2 cup applesauce
  • 1 1/2 cups white sugar
  • 2 teaspoons vanilla extract
  • 2 cups all-purpose flour
  • 2 teaspoons baking soda
  • 2 teaspoons baking powder
  • 1/2 teaspoon salt
  • 2 teaspoons ground cinnamon
  • 3 cups finely grated carrots
  • 1 cup chopped pecans
  Icing
  • 1/2 cup butter, softened
  •  14 ounces cream cheese, softened
  •  1 1/2cups confectioners' sugar
  •  2 teaspoon vanilla extract
  • 1 cup chopped pecans

Directions

  1. Preheat oven to 350 degrees F (175 degrees C). Grease and flour a 9x13 inch pan.
  2. In a large bowl, beat together eggs, oil, applesauce, white sugar and 2 teaspoons vanilla. Mix in flour, baking soda, baking powder, salt and cinnamon. Stir in carrots. Fold in pecans. Pour into prepared pan.
  3. Bake in the preheated oven for 40 to 50 minutes, or until a toothpick inserted into the center of the cake comes out clean. Let cool in pan for 10 minutes, then turn out onto a wire rack and cool completely.
  4. To Make Frosting: In a medium bowl, combine butter, cream cheese, confectioners' sugar and vanilla. Beat until the mixture is smooth and creamy. Stir in chopped pecans. Frost the cooled cake.


Wednesday, September 1, 2010

Daddy’s Birthday Cake – Chocolate Mousse Cake with Macarons

When I asked Ho what kind of cake he wanted for his birthday, he couldn't think of any suggestion.  I know he loves meringue, but I really find it too sweet.  Then I remember he likes macarons too.  So I started searching through internet.
I did it!  I did it!  I finally found the sure win macaron recipe!  Thanks to Not So Humble Pie, I made my first batch of macarons to put on top of a chocolate mousse cake.  The sense of accomplishment overcode everything, we're so happy with the macarons that they became highlight of the cake.  The cake was still good, but the mousse was not smooth enough, texture still has room for improvement.