Monday, July 26, 2010

Baby Shower Cake

I’ve been waiting for a baby shower to come ever since I saw this from Canadian Living long time ago.  It is so easy to wow the group with it.  The only mistake I made was using blueberries puree to colour the buttercream instead of using food colouring.  The colour was light and peel of the blueberries was showing as dots in the cream.  The mommy-to-be was still happy to see the cake though.  She quickly took pictures of the cake with her iPhone and emailed them to her husband.    Too bad I didn’t have good lighting in any of my pictures.  Her iPhone pictures are even better than those I took with a regular camera at home..


Wednesday, July 14, 2010

Adrian's Birthday Cake - Vanilla, No Fruit Please!

It's Adrian's birthday today.  He hates eating fruit and vegetables.  He usually scrapes out all the fruit I have on my cakes before eating them.   Therefore while encouraging him to try eating fruits and veggies whenever there is a chance, I've been blending them in drinks and soup for him.  Yet since it is his birthday, I made the cake exactly the way he requested - Vanilla buttercream with NO FRUIT!

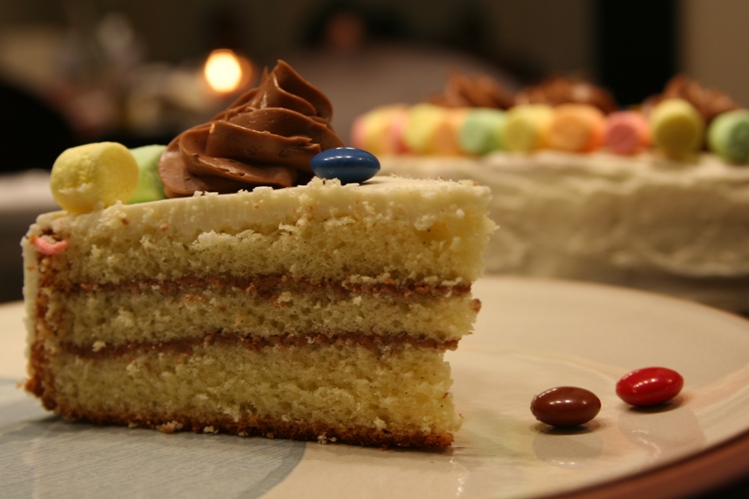
I tried to separate the process into 2 days so that I wouldn’t need to stay up all night to make the cake.  The vanilla bean sponge cake was baked 2 nights ago.  I left it in the freezer for easy cutting. The buttercream was a challenge to me since I had never successfully made one before. Last night, thanks to Jennifer's support over the phone, I finally made it right.  However, when I cut up the cake from the freezer, I found lumps of flour in the cake because I was too rushed that night and didn't fold it in the batter properly.  Sorry Chef Amjad, I should have followed your instructions step by step.  I had to bake a new cake.  At the end I was so tired that I couldn't even space the chocolate rosettes properly on the cake. I had planned to put Smarties and marshmallows on it for decorations but I decided to clean up the kitchen instead and let me artistic husband to do rest of the design, because it was 3a.m. in the morning already!  I think he did a great job!


I had cut the sugar in buttercream to half.  5 cups of buttercream with only half a cup of sugar, too bad I think.    The thin buttercream layer kept moisture in the cake very well too.  Next time I’ll add more vanilla bean though.  I have increased the amount in my recipe below.

Ingredients:

Vanilla Bean Sponge Cake

225g bread flour

225g sugar

7 extra large eggs

1 ½ vanilla beans

1/8 tsp salt

Method:

1. Spray a 9” springform pan with cooking spray then line with parchment paper.

2. Cut vanilla bean lengthwise and scrape the seeds out.

3. Use paddle attachment with your standmixer, beat eggs, sugar and seeds from vanilla bean on high speed for 12 mins to ribbon stage.  The volume should reach at least as high as what you see in the picture  shown below.


4. While waiting for the batter to be ready, preheat oven to 380F.

5. Fold in sifted flour in 3 batches.  Be careful, the flour sinks fast.  Make sure you reach to the bottom when you fold.

6. Pour batter into lined pan, give it a little shake to level it.

7. Bake for 30-35 mins or until cake tester comes out clean.  Cover with foil midway if it gets too brown on the top.  The top will be cut out anyway but you don’t want any burnt smell in your cake.

8. Put the cake in freezer until day of assembly.

Martha Stewart’s Swiss Meringue Buttercream

5 large egg whites

½ cup  + 1 tbsp of sugar

4 sticks butter (454g) cut into 1 tbsp size cubes

1 ½ vanilla extra

50g semi-sweet chocolate chips (optional)

  1. In the heatproof bowl of standmixer set over a saucepan of simmering water, combine egg whites and sugar. Whisking constantly, until sugar has dissolved and mixture is warm to the touch.

  2. Attach the bowl to the mixer fitted with the whisk attachment. Beat the egg-white mixture on high speed until it holds stiff peaks. Continue beating until the mixture is fluffy and side of the bowl is cooled.

  3. Switch to the paddle attachment. With mixer on medium-low speed, add butter several cubes at a time, beat well after each addition. (If frosting appears to separate after all the butter has been added, beat on medium-high speed until smooth again, 3 to 5 minutes more.)

  4. Add vanilla and beat just until mixed.  You should have 5 cups of buttercream here.  If you want to make some of it in chocolate flavour, put 2 cups of buttercream aside and beat for 2 more minutes on the rest to remove any bubbles left.  Scoop out to separate container.

  5. To make  chocolate buttercream:

  6. Melt the chocolate chips in double-boiler or a heatproof bowl set on simmering water.

  7. Once the chocolate has melted, wait for it to cool, about 30 mins.

  8. Mix melted chocolate and the reserved 2 cups of buttercream in the original standmixer bowl (less washing to do!), paddle for 2 mins until mixed.

  9. Keep all buttercream in room temperature if using it in one day.  Keep it in the fridge for up to 3 days, in freezer for up to one month.


Assembly

  1. Cut top of the cake and discard.  You can save it for decorations which need cake crumbs.

  2. Cut the cake into 3 layers.

  3. Brush sugar syrup on bottom layer, then cover it with chocolate buttercream.

  4. Put second layer on top and repeat step 3.

  5. Put the top layer on.  Cover it with vanilla buttercream.

  6. Pipe chocolate rosettes on top and add other candies if you like.


Livie did her own design by adding more Smarties on!

Sunday, July 11, 2010

Tofu Pudding With Dark Syrup 黑糖漿豆腐布丁


Inatei has been our family favourite Japanese restaurant lately.  Their fish are always fresh and you can tell they really care about what they serve.  Ho told me that the restaurant owner’s wife also works there as the dessert chef.  I tried several kinds of their desserts; they are all delicate looking, unique, tasty, but not overly sweet.  Out of all varieties, Ho loves their Tofu Pudding the most.  It’s very smooth and filled with rich soy flavour.  The syrup that comes with it gives a distinct taste that is almost like caramel but lighter.  To me, it’s somewhat close to a smoky flavour.  I was wondering how they made it.  Then I found this recipe from a Chinese blog Oak & Bakes.

It turns out that the special flavour come from a Japanese brown sugar.  The recipe is a very simple one.  However, this Okinara brown sugar (沖繩黑糖) costs Cdn$13 a bag.  I don’t plan to spend this much on an ingredient when I haven’t even tested the recipe before.  Luckily Cherry told me about this Taiwanese brown sugar available at Chinese grocery store.  It’s only $1.99 a bag.  Then I won’t feel as bad even if I fail the recipe.

The original recipe is in Chinese.  Here’s my translation with little changes from me:

Ingredients:

Pudding

650 ml  Unsweetened homemade soya milk *

10g      Gelatin powder

30g      Granulated sugar

Syrup

70g      Okinara Brown Sugar (or Taiwanese)

30g      Maltose

50ml     Water

Method:

1. Sprinkle gelatin on 50 ml of soya milk.  Let it dissolve.

2. Heat remaining 600ml of soya milk in saucepan until warm enough to just before boiling.

3. Add sugar to heated soya milk.

4. Put (1) in microwave for 15-20 seconds to until gelatin is melted.

5. Stir in (4) to (3).

6. Spoon to moulds and let them cool off before putting them in refrigerator for 3 hours.

7. Mix all syrup ingredients in saucepan and bring it to boil.  Simmer to consistency similar to maple syrup.  About 1 minute.  Don’t overdo it, otherwise you’ll get caramel.

* Store bought soya milk is fine too but you have to pick one that is rich in soy flavour.  Some just taste like water with cream colour.


Inatei also serve their pudding with red bean.  I did it too.  It is good in either way!

Friday, July 9, 2010

Chocolate Angel Food Cake


Yesterday my coworker asked me, "You haven't been baking lately.  Is it too hot to bake these days?"  He's half right and half wrong.  The right part is, it's been so hot these days, humidex reached up to 43C during the day.  They said there's even a shade index.  If someone is under the sun with no shade, temperature can reach up to 50C.  It's hard to relate Toronto with this kind of temperature. Weather is changing everywhere, global warming is definitely a factor.

One thing that doesn't change is, that I'm still baking whenever I can find the time.  This  is also the half which my coworker was wrong. I finally saved enough eggs whites for my Chocolate Angel Food Cake.  When I brought this to the office this morning, everybody said happily, "You baked!"

The recipe was adapted from Recipezaar.  However, since most western recipes are sweeter than what I like, I reduced the sugar by 1/3.  It's sweet enough for me.  If you want to further reduce the sugar, take off 1/4 cup of sugar from the flour mixture.  Do not remove sugar from the amount used for beating the whites.  Egg whites need the sugar to reach stiff peak faster.

Ingredients


  • 2/3 cup sifted cake flour (not self-rising)

  • 1/3 cup unsweetened cocoa

  • 1 cup granulated sugar, divided

  • 12 large egg whites, at room temperature

  • 1 1/2 teaspoons vanilla extract

  • 1 1/2 teaspoons cream of tartar

  • 1/4 teaspoon salt


Directions


1 Heat oven to 375 degrees.

2 Sift flour, cocoa and 1/2 cup granulated sugar together; set aside.

3 Beat egg whites at low speed in a large mixer bowl until foamy, about 5 minutes.

4 Add vanilla, cream of tartar and salt.

5 Gradually increase speed to medium while beating in remaining 1/2 cup granulated sugar, 1 tablespoon at a time, 5 minutes.

6 When sugar is incorporated, continue beating to stiff peaks, 2 minutes more.

7 Sift one third of dry ingredients over whites; gently fold in with rubber spatula.

8 Repeat process 2 more times.

9 Pour batter into ungreased 10-inch tube pan.

10 Cut through batter to remove air pockets.

11 Bake 35 to 40 minutes, until top springs back when gently pressed.


12 Invert and hang pan on neck of bottle to cool.


13 To unmold, run a thin knife around side of pan and tube; invert pan.

14 Turn cake upright onto serving plate.


It's very important to use a knife to cut through the batter after pouring it in the tube pan.  Otherwise there will be large holes in the cake.


End product should be soft like marshmallow, and it is!  The cake was gone within 15 mins!

Finally after 3 days of heat wave, the temperature cooled down. It's 27C and we call it cool!  When I took the kids home after dinner, Livie suddenly called out, "Mommy look!  The sky is so beautiful!"  I looked through the window.  Wow, she is right!


Wednesday, July 7, 2010

Lemon Pistachio Cookies with Fleur de sel


After making double the recipe of custard for the strawberry tart, I have 10 egg whites left in my fridge.  As someone who hates to waste food, meringue, pavlova, and angel food cake all came to my mind suddenly.  Since I haven't made angel food cake for a long time, I tend to do that one with the whites.  However, I need 12 whites for it.  Then I found this cookie recipe on 5 second rule which uses 2 egg yolks.  Perfect!

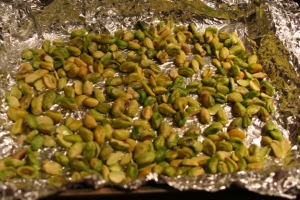
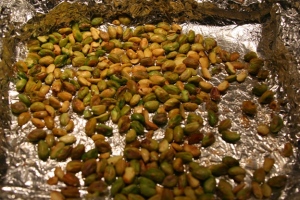
I tried baking soda and boiling water to remove skin from hazelnut before, but I was not sure if pistachios would take the baking soda well.  Then I read from another site about soaking pistachios in salt brine before skinning and roasting.  I followed the instructions but found the process a lot slower and involved more labour.  It worked but I'll go back to the boiling method next time.  As you can see from the picture below, the skin can be removed in one piece easily after soaking for 30 mins.


The original recipe used 3/4 tsp cardamom.    I was struck by the intense fragrance of it.  Since t's my first time using this spice, I reduced the amount by half.  Yet I couldn't smell it at all afterwards.  Guess I should have kept the original amount just to try it.  I also reduced the sugar to 150g.  It's the perfect level for me.


The first lot I made with 375F browned too quickly with the centre not fully set.  For the second lot, I lowered the temperature to 350F and increased the oven time for 2 mins.  They turned out much even inside out.  The Fleur de sel gave it a nice touch too.  It didn't feel greasy to me at all (even though I could see the grease left on the silpat:-)).  I put 8 oz of butter in the dough, and used only half of the dough to make 24 cookies.  The remaining half of the dough is still in my fridge.  I can bake more whenever I want.  This will be a convenient treat for any impulse dinner with friends.


Tuesday, July 6, 2010

Olivia’s “Funny Story”

Livie and I were playing house with her Hello Kitty toy house.  She was the daddy who’s trying to tuck me (in the role of Hello Kitty) in to bed.

Olivia: Time for bed!

Me: Ok!

Olivia: Do you want a story?

Me: Yes, please!

Olivia: Let me tell you a funny story.  It’s really funny.  Once there’s a man, who found a lady.  Now here’s the funniest part – and they fall in love!

Me: …?

Olivia: The End!

Me: … ?!?

Olivia: Wasn’t that funny?  It’s so funny, they fell in love, hahaha…

Me: ………………

Sunday, July 4, 2010

Strawberry Tart


Ever since I picked up this hobby of baking, Ho likes to bring dessert to all parties at friends' place.  I enjoy making dessert for him too.  Then I get to practise more and won't get stuck with the calories.  :-)

I combined George Brown pastry dough recipe and custard from Food Network Ina Garten's Strawberry Tart recipe to make this tart.  Unfortunately I forgot to remove the tart pan before taking the pictures.  Well, the tart still look good in it!

Some people put pie beans on the dough when baking.  It's not necessary as long as you poke enough holes at the bottom with fork.


Don't be alarmed if you see the dough raised at time of baking.  It will fall back down.  That's what happened to mine.


Another thing I forgot was to take a picture before I pour the custard in.  I brushed a layer of coating chocolate on top of the crust to separate it from the custard.  This will avoid the crust from getting soggy from moisture.

The strawberries are so fresh and sweet now.  There is no better choice of ingredient for dessert in this season.


I found a lot of recipes mixing pistachios with strawberries.  I sprinkled a few on the tart.  The colour of this dessert was brightened up a lot because of the green colour nuts.  One small tip: this tart has to be cut with a serragated knife in sawing motion.  Otherwise the crust will crumble.


I had extra dough left for 7 more individual tarts.


The strawberry tarts family!

Saturday, July 3, 2010

Mango Coconut Tapioca Drink (芒椰奶西)

At dinner time, Ho asked me, "Is it hard to make 芒椰奶西 Mango coconut tapioca?"  Jennifer and Francis were with us at the time, we all think that it shouldn't be that hard.  Basically the name of the dessert says it all.  So we paid a visit to grocery store to pick up the ingredients for our experiement.  As you can see from the pictures, it was a success.

Ingredients (serves 6):

1/4 cup tapioca

1 1/2 cup water

8 oz mango puree

10 oz coconut milk

1 cup icecubes

sugar to taste

Method:
  1. Bring water to boil.
  2. Pour in tapioca, boil for 5 mins.  Turn off heat and leave tapioca in hot water for 20 mins until the colour is clear.
  3. Rinse them in sieve under cold water.  Set aside.
  4. Mix mango puree, coconut milk and ice with blender.
  5. Taste, if necessary, add sugar and blend a few more seconds.
  6. Put one scoop of reserved tapioca in glass, pour mango mixture in and stir.
  7. Add a few mango cubes and drizzle extra coconut milk on top as garnishing.

It can easily turn  into 楊枝甘露 if you mix in pomelo bits.

Swimming Lessons

After 4 or 5 swimming sessions at community centre, my kids still don’t know how to swim.  For Livie, it’s because she had been sick frequently so she kept missing classes.  For Adrian, he was doing well until he had to go to the big pool.  Suddenly he hated swimming, didn’t even want to walk near the pool.  Therefore we stopped swimming lessons for half a year.

I heard about this swimming school from a friend, so I suggested taking everyone there to have a look yesterday.  On the way we asked Adrian if he wanted to start taking swimming lessons again, he said “No” right away.  Yet when we arrived there, he saw that it’s a difference place, he finally told us what happened at the community centre to us.  He said the last instructor he had at the community centre didn’t give him any warning when she took off her hand on his back, he just sank in water.  He described her as an “evil” instructor.  Then he kept telling his experience to the nice young lady at the reception desk of the swimming school.  When the girl told him that they wouldn’t hire any person with “evil” written on the résumé, Adrian was relieved.  Then on the way home, he couldn’t stop telling me how excited he was about starting swimming lesson the next day.  

We decided to put them in individual class of the swimming school because we want them to catch up quickly on what they learned before.  It was a good decision because I can see how comfortable they were in water today.  They are back to the level where they left off after just one class.  Maybe I should start my swimming lessons soon too!