Monday, March 22, 2010

Strawberry Pavlova

Remember I gave a preview of what I was making Saturday night at the end of my Black Forest post?  After the stressful experience I had at the GB Black Forest project, I made this easy pavlova just to boost up my confidence.  I was worrying about the shape of the meringue when I saw it in the oven.  Instead of a valley in the centre for holding the cream and fruit, I had a little hill.   On day of friend's house-warming party, I couldn't go to pick up fresh fruits from store because we left the house late as usual.  Luckily I had cream and some strawberries in my fridge.

This was how the pavlova looked like before I started to put any topping on.  Rather square looking, isn't it?  The crack on top is ok, seems like it's hollow inside when you look closely.  It means the meringue has a thin crust.


You cannot put the cream on this dessert too early, otherwise the meringue will be softened.  Not knowing if my friend had a mixer at her new house, I brought the hand mixer with me.  I started to put the cream on, carefully not to put it too close to the edge.  Don't want it to fall down on the side!  Ok, cream is staying put.  Now the strawberries.  Few pieces by few pieces I added...  "Crack!"  the pavlova collapsed!  haha.  Ended up I didn't need to put a valley there when I baked the shell.  So funny!

Thanks to my friends, one of them took this picture for me with his I-phone.  Even though the resolution is low but it gives you exactly the same view I had when the weight of strawberries and cream brought the meringue down.  You can see thickness of the crust after part of it fell to the centre.


I forgot to bring icing sugar to beat the cream with.  Honestly I like it better this way because this dessert is way too sweet for me.  Flavour of sugarless cream and sweet strawberries blended in with the meringue very well.  This is the second post I have on pavlova.  Last time I had 2-coloured fruits - raspberries and blueberries.  Strawberries only looks good too.  Since I saw some soft meringue residue on the parchment paper when I transferred it to the dessert tray, I thought this one was undercooked.  It was not.  Happy...

Last piece left!  Well, my beloved husband had 3 servings.


Another friend took these sliced view and overview pictures of my pavlova.  I have to post them all, otherwise he may not take pictures for me in the future :-)

This is the best pavlova recipe I've tried.  You can adjust the sugar level to as low as 6.5 oz.  Any amount lower may not give you the stiff peak when beating the egg whites.  The meringue may not be baked properly that way.

http://www.joyofbaking.com/Pavlova.html

Saturday, March 20, 2010

Black Florest Cake - Baking Arts Week #9

Wow, this was the most stressful class for me so far.  While I was struggling to put cream on the cake, I tried and tried.  No matter how much cream I added, the side of the cake kept showing after I smoothed the cream with a spatula.  While all the people around me were finishing their first cake, starting the second one, I was still masking my first one.  The others were washing utensils, tidying up, I was still smoothing my cake!  I so wanted to finish it and leave...  So frustrating.  Turned out that the instructor said I had reversed the base plate that was holding the cake.  No wonder.  Cherry tried to help me but I didn't want to slow her down.  I ended up to be the last one in the class to leave.  Students from the next class had arrived, but I was still washing the mixing bowl...


One thing I'm happy about is the chocolate shavings I made.  They really look like logs in the forest. :-)


I felt totally defeated after this class.  Cake decoration is my weakness.  Felt so lucky that I took Cherry's advice of doing one cake only.  Otherwise, I would be stuck with a half decorated cake.  Then I would feel worse.  At least I have a completed cake now.


Hmm... I can bring this cake to my lunch party tomorrow, but it's too small.  I started baking another pavlova.  Still waiting for it to cool down in the oven.  I did not make the dent deep enough.  It expanded.  I hope the cream won't fall off too quickly.

Thursday, March 18, 2010

Japanese Melon Pan日式酥皮蜜瓜包


I call this a less greasy version of Hong Kong Style Bor Lor Buns 菠蘿包.  Some with chocolate chips too!  My kids gave them one thumb up when they had them for breakfast the next day.

Finally made bread at home for the first time.  I have always hesitated to make bread myself because I think it's too difficult and takes too long.  Then I found this recipe for Japanese Melon Pan.  http://happyhomebaking.blogspot.com/2007/08/japanese-melon-pan.html  Both Ho and I love bread from J-Town.  I decided to give it a try.

Since I still think that bread making is a long process, I measured everything last night.  Pastry ingredients on one side of the counter, and bread dough on the other side.   Tonight when I put the flour in with the yeast, I added the sugar for the pastry by mistake.  I also forgot the recipe suggested to leave some of the water behind to adjust the moisture level.  So I ended up throwing out the whole thing.  Back to step one - measuring everything again.  Other than this, the process seems to go smoothly but slowly as expected.  Why can't I bake as fast as Jennifer?

So, while the dough is proofing, I made the crust.  It's very sticky.  This picture was taken after I put them in the fridge for 20 mins.


Then I roll them out one by one, and covered each dough with a piece of pastry crust.


See the ones I had marked with initials of each member in the family?


This is the proper look of melon pan.  I think it looks like a grenade now.  :-)


The recipe said oven time was 12 mins at 170C (338 F).  10 mins passed, they still looked very pale.  I wonder if I should have brushed them with egg wash even though the recipe said only use sugar.


After adjusting the temperature to 350F and left the bread in the oven for 30 mins, I start to worry that the bread will be too dry.  So I took them out.


Surprisingly, the inside was not dry.  My husband said it tasted more like a cake.  Of course!  His first bite was mostly the crust.  When I gave him more of the bread part, he said it did have the bread texture.  However, I actually find it too moist.  Maybe I should have left them in the oven longer?  Yet bottom of the bread already started to harden...  Or maybe I didn't put enough yeast?  Or the proofing time was not enough.  They didn't rise to twice the size.  The crust is good though.

Well, they taste good now.  Next time!  Next time they'll be better.

Tuesday, March 16, 2010

Artic Mandarin Cheese Pie (No Bake)

Naa, didn't bake this tonight, not that crazy.   Found this recipe from a recipe book for diabetics.  Sounds super easy, so I gave it a try.  Mixed 1 block of 8 oz cream cheese and 6 oz of thawed orange juice together, then stir in 1 cup of whipped cream.  Pour the mixture in a prebaked pie shell bought from store.  Cover and freeze for 4 hours. That's it!   I did this on Saturday.  We had too many desserts on Saturday already, including my mango bavarian cream, Jennifer's creme brulee, and cookies from GB!  We were so full that day that I didn't even bother to take the pie out from the freezer.

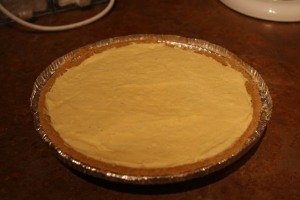
This is the pie before decorations.


Used one 10 fl oz can of mandarins to cover the top.


This kids were behaving very well tonight, so I offered this treat to them.  According to the recipe, I just need to remove the pie from freezer 10 mins from serving time, and decorate it with mandarins will be fine.  However, 10 mins are not enough because I could still feel the ice in my mouth.  As this was from a cookbook for diabetics, original asked for fat free cream cheese and whipped topping.  I've never seen fat free cream cheese in the stores I go to.  I have fresh whipping cream at home.  So my version is not exactly for diabetics.  Yet, it's still not too sweet. Ho thinks it's ok, just can't feel the smoothness with the ice in centre.  Adrian didn't like it, but he ate 2/3 of it!  Livie rejected it as usual like she rejects ice cream.  "Too cold, mommy!".  Ok, if I'm going to make it again, I think I'll do a lime flavour and let it sit in the fridgerator for half a day.  It should be better.

Zerba Cake


When was the last time I baked?  It was only last Tuesday but it seems so distant to me already.  Looking at Cherry's and Jennifer's blogs, I have to work hard to keep up!  Then I decided to make an easy fun looking cake last night.  When Ho, my husband, asked me why I was baking late at night, was it for work?  I told him, oh, you have a business meeting tomorrow morning.  This is for your breakfast. I can always find myself an excuse to bake. :-)  He's satisfied and went on with his housekeeping.  I have to give him credit for tidying up the house.  He does a very good job when he is determined.  It's almost like we moved to a new house these days.

So it is supposed to be an easy and fun looking cake.  From the original post http://cookingcrave.blogspot.com/2009/10/zebra-cake.html it is.  When I did it, it's not.  I couldn't find emulsifier and chocolate emulco anywhere.  First defeat there.  I read from a site saying that as long as I beat the batter long enough with ingredients added in proper order, I wouldn't need the eimulsifier.  As for the emulco, I just melted some bittersweet chocolate to replace it.  The batter was fine, until I added the chocolate/water mixture...

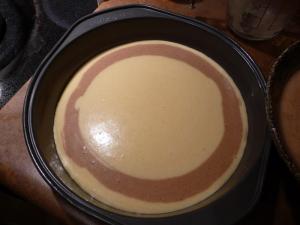
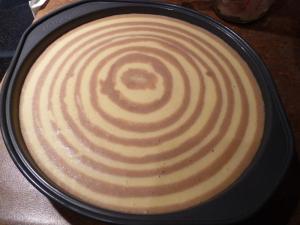
It was fun scooping the batter in the pan and see it spread out in 2 colours just like a zebra.


I like taking pictures of my baking in the oven lately...  It's exciting to see it rise properly even without the emulsifier.


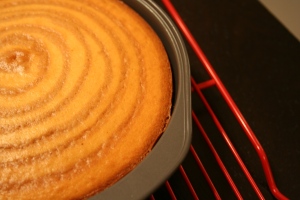
Freshly taken out from the oven.  You can still see the rings on top.  After letting cool in the pan for a few minutes, the cake separated from the pan nicely by itself.


I cut it up...

Oh no!  All the chocolate batter sunk to the bottom!


Oh well, I think I will simply melt the chocolate and mix it with cocoa with just a few drops of water next time.  Then the chocolate batter won't be too thin to sink.  Yet, the texture and taste are both very good.  As cookingcrave said, it's not too sweet.  I like it and will definitely make it again.  Hopefully I can post pictures of a cake with the 2 batters separated line by line very soon.

Sunday, March 14, 2010

Cards

Adrian is in love with magic these days and likes to perform magic tricks to people frequently.  One day last week he was holding a card in front of me.  Actually those are 2 cards stuck to each other back to back.

Adrian:  Ok, see this card?  Try to remember this card.

Me:  Adrian, did you stick 2 cards together?  (My concern is, he opened a new deck of cards and ruined 2 cards.)

Adrian:  You're supposed to remember the card and then I will tell you that the card has magically changed.

Me:  Son, but that's a new deck of cards, we won't be able to play with them anymore, 2 cards are gone!

Adrian:  That's ok, I still have 50 of them.

Saturday, March 13, 2010

Cookies - Baking Arts Week #8

Very tired today.  Started off hurting my hand when I tried to attached the whip to the standmixer.   The bruise is going to stay for a long while.  Oh man, it HURTS!  Lesson taught us, always attach the whip or whisk when there is no ingredients in the bowl.  The butter was too hard and it was in the way when I put the whip in the middle.  Well, I learned it the hard way.

Pretty neat looking cookies.  I piped the rosettes too big at the beginning.  Instructor wanted me to redo all of them.  Every cookie should be in 2-bite size.  That's ok, look on the bright side, I got more chances to practise.  :-)  Yet it made us the slowest team to finish piping and baking the cookies.  It was a lot of fun making them in different shapes.  Cookies can be so versatile.  We only used jam and chocolate, see how many variations we made?  I even wrote the kids' initials on 4 cookies.

I like the "S" shape the most.

Then we drizzled chocolate on some, dipped chocolate on some, or squeezed jam on or in between to make cookie sandwiches.  However, GB recipe used half shortening and half butter.  I find the cookies fluffy enough with volume but the flavour is not strong enough.  I'll use all butter if I'm going to make them again.